Skip table of contents

Using our App Store in Management Interface

Purpose and scope

The App Store provides access to a set of third party integrations and Premium add-ons that you can install, configure and manage.

This article outlines the App Store’s benefits and explains what it is and how it operates. It includes a step by step guide on how to discover, configure and manage apps that are contained in the App Store:

Read this article for more information about the App Store’s screen layout.

Assumptions

  • Typically, to integrate with Digital Commerce, you will be asked for your credentials for the third-party software. You are responsible for maintaining an active account for third-party software you wish to integrate.

  • Any costs associated with using third-party software is your responsibility.

Benefits

The key benefits of the App Store:

  • Provides you with extra control so you can configure apps and plugins when it suits you

  • Gives you visibility of our Premium SmartPacks and Multi-channel products

Introducing terms and concepts used in this article

Term

Definition

Payment gateway

a service that allows you to accept and authorize credit or debit cards securely.

How to use the App Store

All available apps are listed on the App Store. There is a two step process to integrate any app with WebShop:

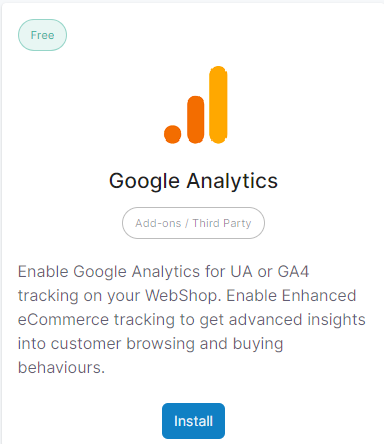
  1. Install the app. Locate the app you wish to install, and click Install. This gives you access to the app. An example of this is shown:
  2. Configure the app.

Remember you have control over what apps you install, configure and use from our App Store.

Tasks

Assumptions

  • You are logged into Management Interface.

  • You have previously installed the app.

Open App Store

Open

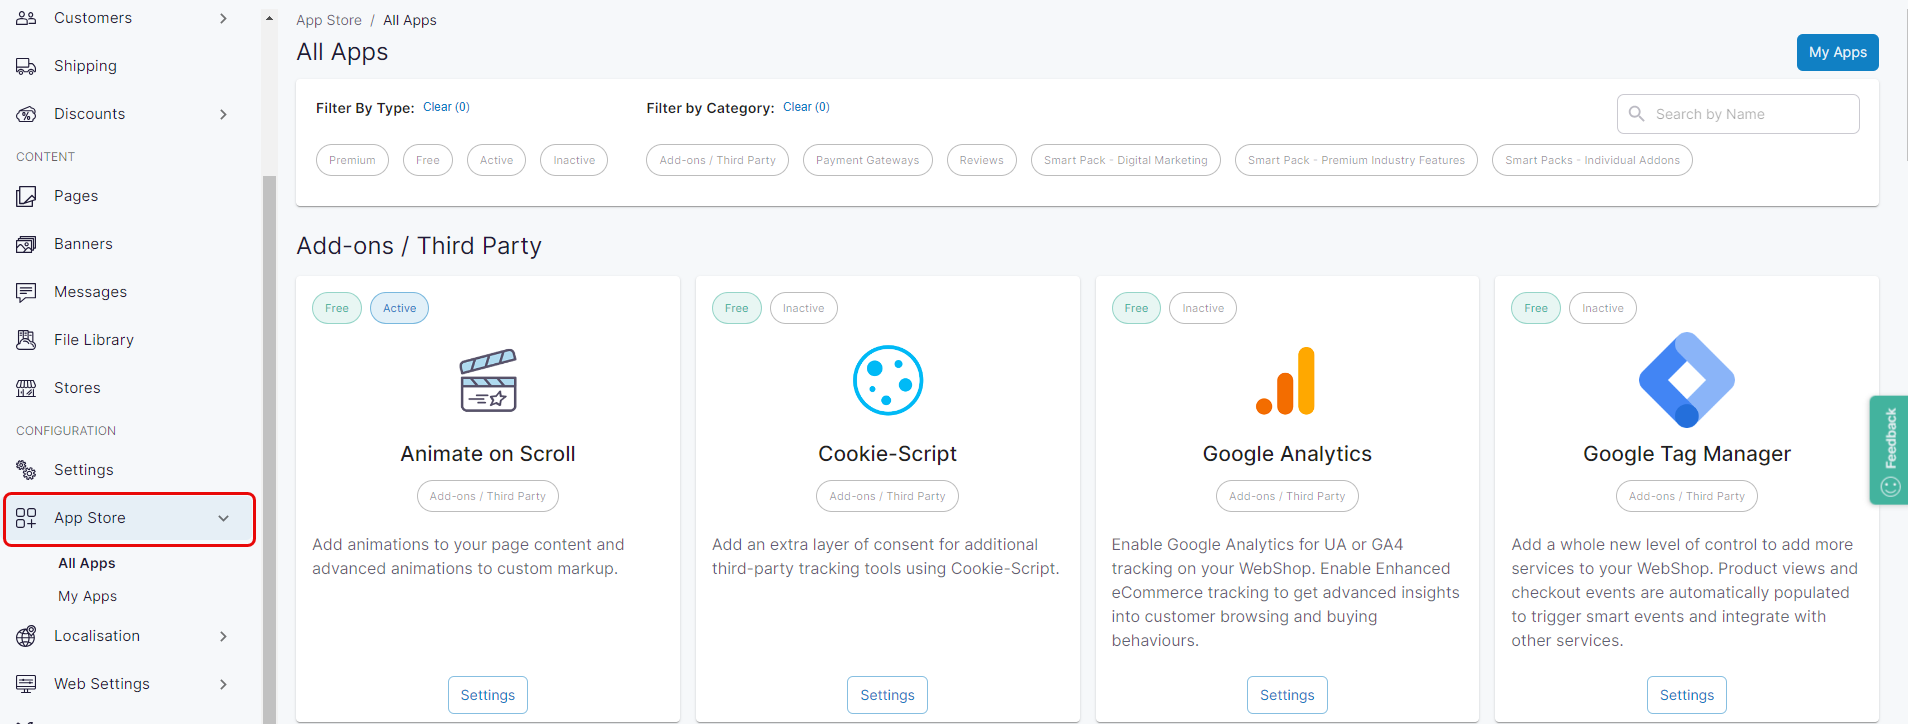
Click App Store under Configuration on the left side menu. The App Store is displayed.

Filter app listing or Search for an app

Filter or Search

When the App Store is opened, it initially lists all available apps.

  • To toggle between All Apps and your apps, click My Apps at the top right of the screen. To toggle back to all available apps, click All Apps at the top right of the screen.

  • To filter by type, select one or more types from the options listed (“Premium”, “Free”, “Active” and “Inactive”). The apps listed will reflect the types you have selected.

  • To filter by category, select one or more categories from the options listed. The apps listed will reflect the categories you have selected.

  • Use a keyword search to locate a specific app.

Manage payment gateways

Manage

Locate the payment gateways category in App Store. The apps included in this category are available as part of the standard Digital Commerce product. Each payment gateway requires different credentials and is activated slightly differently.

Click Settings under the payment gateway you wish to configure to see what is required to activate it.

There are two steps to configuring a payment gateway:

Step 1: Activate a payment gateway

Step 2: Configure it to be a payment method during Checkout in WebShop

Step 1: Activate a payment gateway

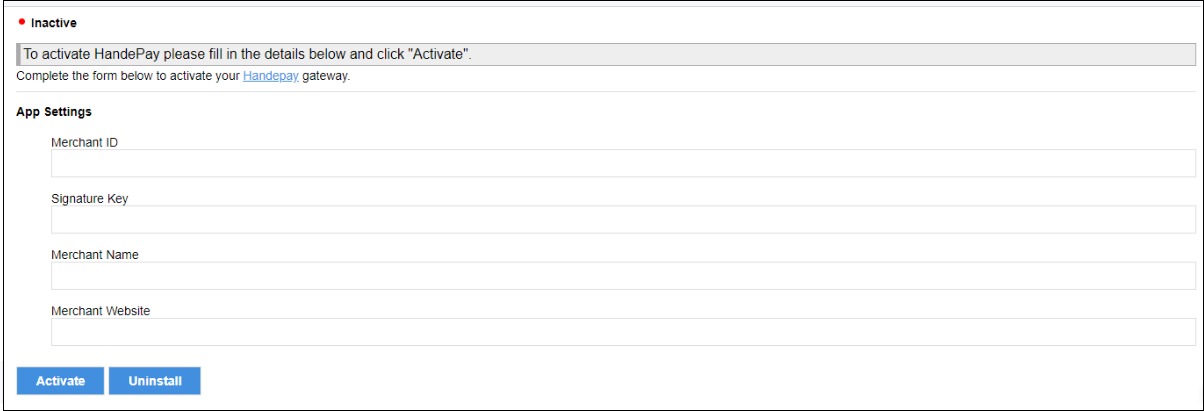
The top section (“App Settings“) of the Settings screen provides a form that allows you to enter your payment gateway’s credentials.

To activate a payment gateway, enter your payment gateway credentials. Click Activate to enable the payment gateway.

Key points

  • Each payment gateways has pros and cons. As a merchant, you will need to look at each one and determine which best suits your business and your processes.

  • Read setup documentation on the relevant payment gateway to ensure that you have accurate credentials prior to activating the payment gateway on WebShop.

  • We support many payment gateways, and some of them are not available yet in our App Store. Contact us if you wish to configure a payment gateway that is on our list of Supported Payment Gateways and not yet in our App Store.

Activating your payment gateway does not make it visible as a payment method during Checkout.

Follow directions below to make it visible as a payment method.

Step 2: Configure payments gateways to display as a payment method during Checkout

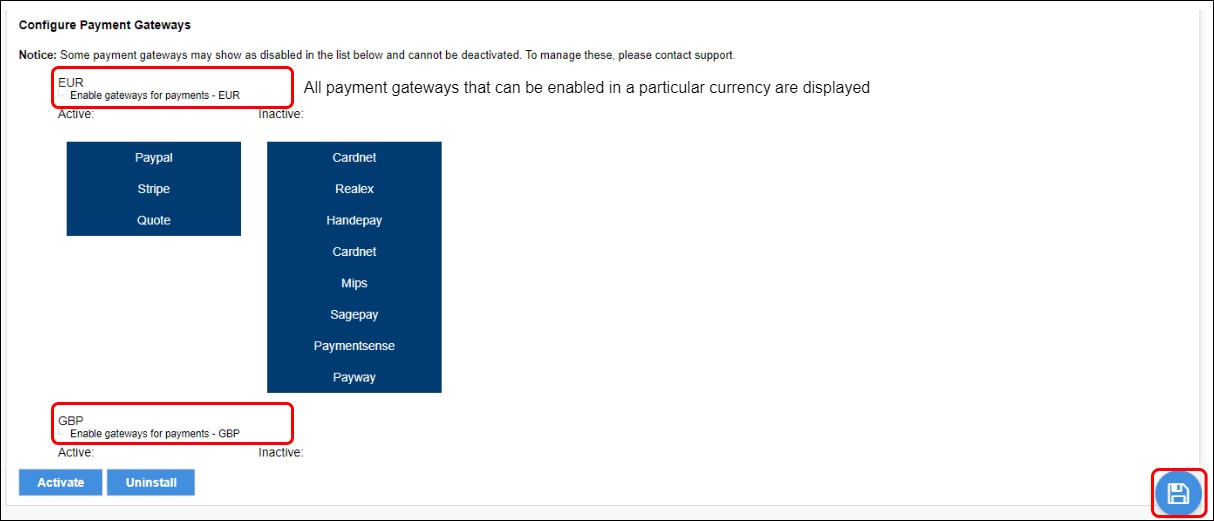
The bottom section (“Configure Payment Gateways“) of the Settings screen contains functionality that allows you to configure your payment gateway so that it is displayed as a payment method during Checkout.

The screen displays two columns, containing active and inactive payment gateways for each currency that the payment gateway can process. A payment gateway is listed under Active if it is visible as a payment method during Checkout. Otherwise, it is listed under Inactive, which means it is not visible during Checkout.

To make a payment gateway visible as a payment method during Checkout, drag the payment gateway from the Inactive column to the Active column.

Click Save to save changes.

Update payment gateway app settings

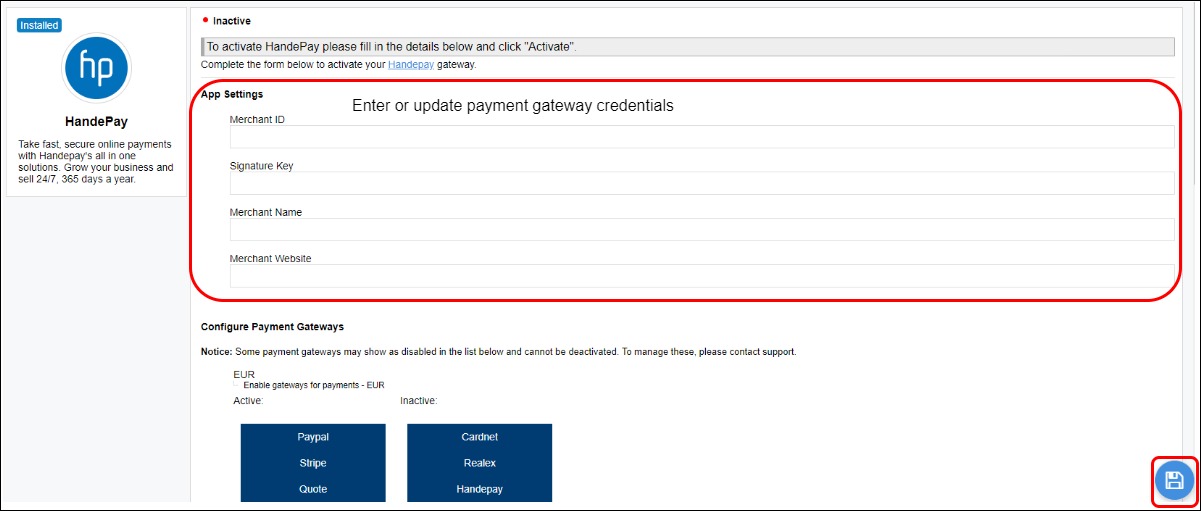
To update your payment gateway credentials, replace existing with new information. Click Save to save changes.

Deactivate a payment gateway

To deactivate a payment gateway, click Uninstall.

Deactivating your payment gateway does not remove it as a payment method during Checkout.

Drag the payment gateway from the Active Column under “Configure Payment Gateways“ to the Inactive column to remove it as a payment method.

Manage reviews

Configure and manage

Note

You can only integrate one product review app with WebShop at any time.

Locate the Reviews category in App Store.

Click Settings under the product review app you wish to configure to see what is required to activate it.

Want more information? Select the app you wish to configure and activate:

Configure tax

Configure & manage

Locate the Tax category in App Store.

Click Settings under the Tax add-on you wish to configure to see what is required to activate it.

Want more information? Select the app you wish to configure and activate:

Configure and manage Customer Service apps

Configure & manage

Locate the Customer Service in App Store.

Click Settings under the Customer Service add-on you wish to configure to see what is required to activate it.

Want more information? Select the app you wish to configure and activate:

Manage Security apps

Configure & manage

Locate the Security category in App Store.

Click Settings under the Security app you wish to configure to see what is required to activate it.

Want more information? Select the app you wish to configure and activate:

Configure and manage third party add-ons

Configure & manage

Locate the third-party add-ons category in App Store. The apps included in this category are available as part of the standard Digital Commerce product. Each third party add-on are activated and managed differently.

Click Settings under the third-party add-on you wish to configure to see what is required to activate the add-on.

Want more information? Select the app you wish to configure and activate:

Find out more about our Premium SmartPacks and Multi-channel products

Find out more

This is a Premium add-on. Contact our Sales team to find out more.

Our SmartPacks contain additional features that are specifically for your industry sector (Builders Merchants SmartPack, Spare Parts SmartPack and Electrical Wholesale SmartPack) or business function (Digital Marketing SmartPack). Our Add-on product, Uniform Management, allows you to accelerate the process of ordering and reordering sets or packs of apparel and products within large organizations.

Digital Commerce Multi-channel products include Punchout, Brightpearl Customer Portal & Purchase Order Portal and Catalogue API.

JavaScript errors detected

Please note, these errors can depend on your browser setup.

If this problem persists, please contact our support.