Purpose and scope
The App Store provides access to a set of third-party integrations and Premium add-ons that you can configure and manage. This article provides a step-by-step guide on how to configure and manage Avalara AvaTax, which is listed in the Add-ons / Third Party section of the App Store.
Read Integrating AvaTax with WebShop for a description of how the integration works.
Assumptions
-
You are responsible for maintaining an active Avalara account.
-
Any costs associated with using your Avalara account are your responsibility.
Step by step
Assumptions
-
You are logged into the Management Interface.
-
You have previously installed the app on WebShop; read 'How to use the App Store' for more information.
-
You already have an Avalara account set up with the relevant data uploaded. If you do not, please contact our support team for further assistance.
Step 1: Open App Store
Open
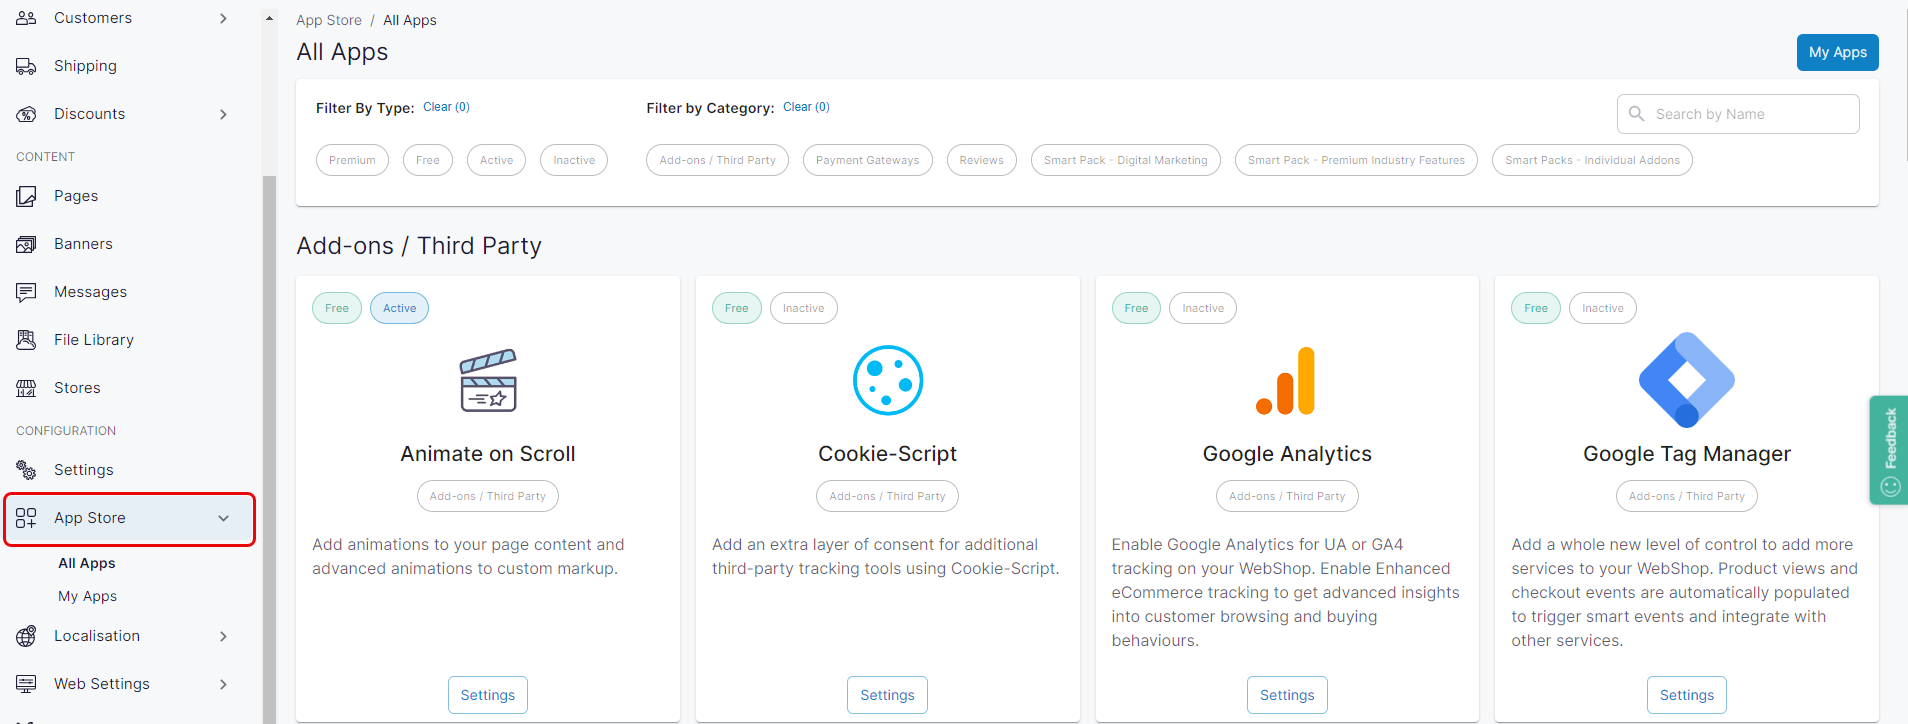
Click App Store under Configuration on the left side menu. The App Store is displayed.
Step 2: Configure and manage
Configure & manage
-
Locate the third-party add-ons category in App Store. The apps included in this category are available as part of the standard Digital Commerce product. Each third party add-on are activated and managed differently.
-
Click "Settings" under Avalara to view the requirements for activation.
Avalara AvaTax is a cloud-based software solution for calculating the tax owed on products sold. It regularly applies updated rates based on location, legislation, tax regulations, item taxability, and more. Our integration with AvaTax provides your customers with a seamless checkout process, with relevant sales tax applied to their carts.
Data required
|
Field name |
Required |
Description |
|---|---|---|
|
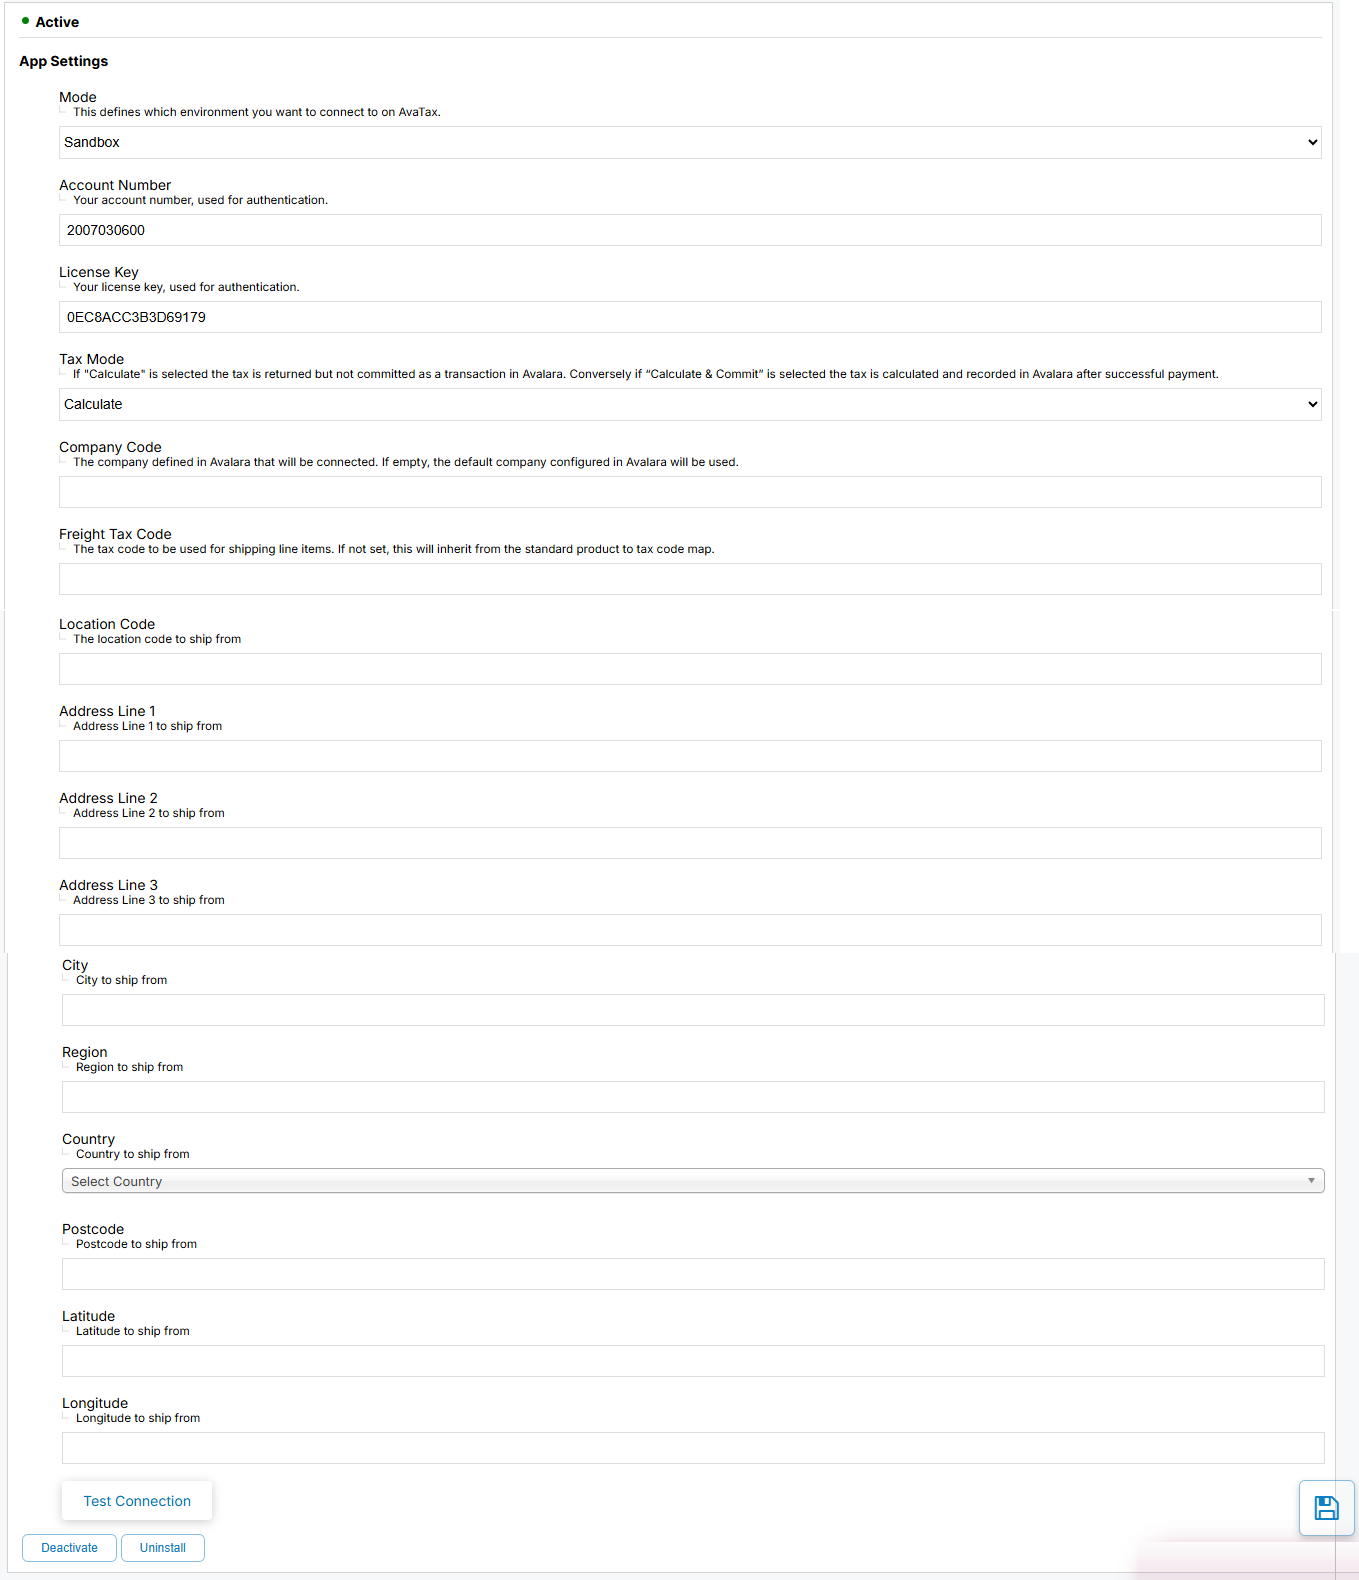
Mode |
Yes |
Specifies the environment that you wish to set up. Options available:
|
|
Account number |
Yes |
Avalara account number. Read how to find your account number in the Avalara Knowledge Center1 |
|
License key |
Yes |
Avalara license key. Read about license keys on the Avalara Knowledge Center2 |
|
Tax mode |
Yes |
Specifies how you wish the integration operates. Options available:
|
|
Company code |
No |
Before setting up the integration between WebShop and AvaTax, you must create a company profile for AvaTax. You can either use the default code generated in AvaTax or specify your own. Find out more information on creating a basic company profile in the Avalara Knowledge Center3 The company code is assigned in AvaTax as part of your Avalara company profile. You can include as many company codes as you wish, separated by a space. |
|
Freight tax code |
No |
Specifies the tax classification for freight/shipping. If included, this specifies the tax classification for shipping items. |
|
Location code |
No |
Specifies the ShipFrom location. The location code is set up in Avalara and defines a specific ShipFrom location. While the ShipFrom fields are optional when you set up the Avalara app, we recommend including the ShipFrom address. Different taxes are applied based on where the products are shipped from. If the ShipFrom fields are not populated, the tax owed is calculated based on the ShipTo (delivery) address. |
|
Address Line 1 |
No |
Specifies the first line of the ShipFrom address. While the ShipFrom fields are optional when you set up the Avalara app, we recommend including the ShipFrom address. Different taxes are applied based on where the products are shipped from. If the ShipFrom fields are not populated, the tax owed is calculated based on the ShipTo (delivery) address. |
|
Address Line 2 |
No |
Specifies the second line of the ShipFrom address. Different taxes are applied based on where the products are shipped from. If the ShipFrom fields are not populated, the tax owed is based on the ShipTo (delivery) address. |
|
Address Line 3 |
No |
Specifies the third line of the ShipFrom address. Different taxes are applied based on where the products are shipped from. If the ShipFrom fields are not populated, the tax owed is based on the ShipTo (delivery) address. |
|
City |
No |
Specifies the city of the ShipFrom address. Different taxes are applied based on where the products are shipped from. If the ShipFrom fields are not populated, the tax owed is based on the ShipTo (delivery) address. |
|
Region |
No |
Specifies the region of the ShipFrom address. Different taxes are applied based on where the products are shipped from. If the ShipFrom fields are not populated, the tax owed is based on the ShipTo (delivery) address. |
|
Country |
No |
Specifies the ShipFrom country using a dropdown menu. It is saved and sent as a two-letter country code. |
|
Postcode |
No |
Specifies the postcode of the ShipFrom address. Different taxes are applied based on where the products are shipped from. If the ShipFrom fields are not populated, the tax owed is based on the ShipTo (delivery) address. |
|
Latitude |
No |
Specifies the latitude of the ShipFrom address. If the latitude is malformed or out of range, Avalara may miscalculate the tax since it may ignore the coordinates or use an incorrect jurisdiction. |
|
Longitude |
No |
Specifies the longitude of the ShipFrom address. If the latitude is malformed or out of range, Avalara may miscalculate the tax since it may ignore the coordinates or use an incorrect jurisdiction. |
Remember to manually verify that the ShipFrom fields match those in your ERP and in your Avalara account, as no automatic verification occurs upon activation.
-
Click Test connection to verify that the link operates correctly.
-
Click Install to complete the web service installation between Avalara and WebShop. Once the Avalara app has been installed, you can view the Tax Codes screen in the Management Interface, which you can use to configure your product tax codes.
-
Click Activate. This activates the web service between Avalara and WebShop, which means that during checkout, AvaTax acts as the tax calculations engine for transactions made in the United States of America (USA) and Canada.
More information
References
Note that we do not have any control over the content of external sites.
1 External site: Avalara Knowledge Center (Your account)
2 External site: Avalara Knowledge Center (License Keys)
3 External site: Avalara Knowledge Center (Create a basic company profile)