Purpose
To demonstrate how you can change the layout of your account dashboard using the Templates Editor.
Watch
More information
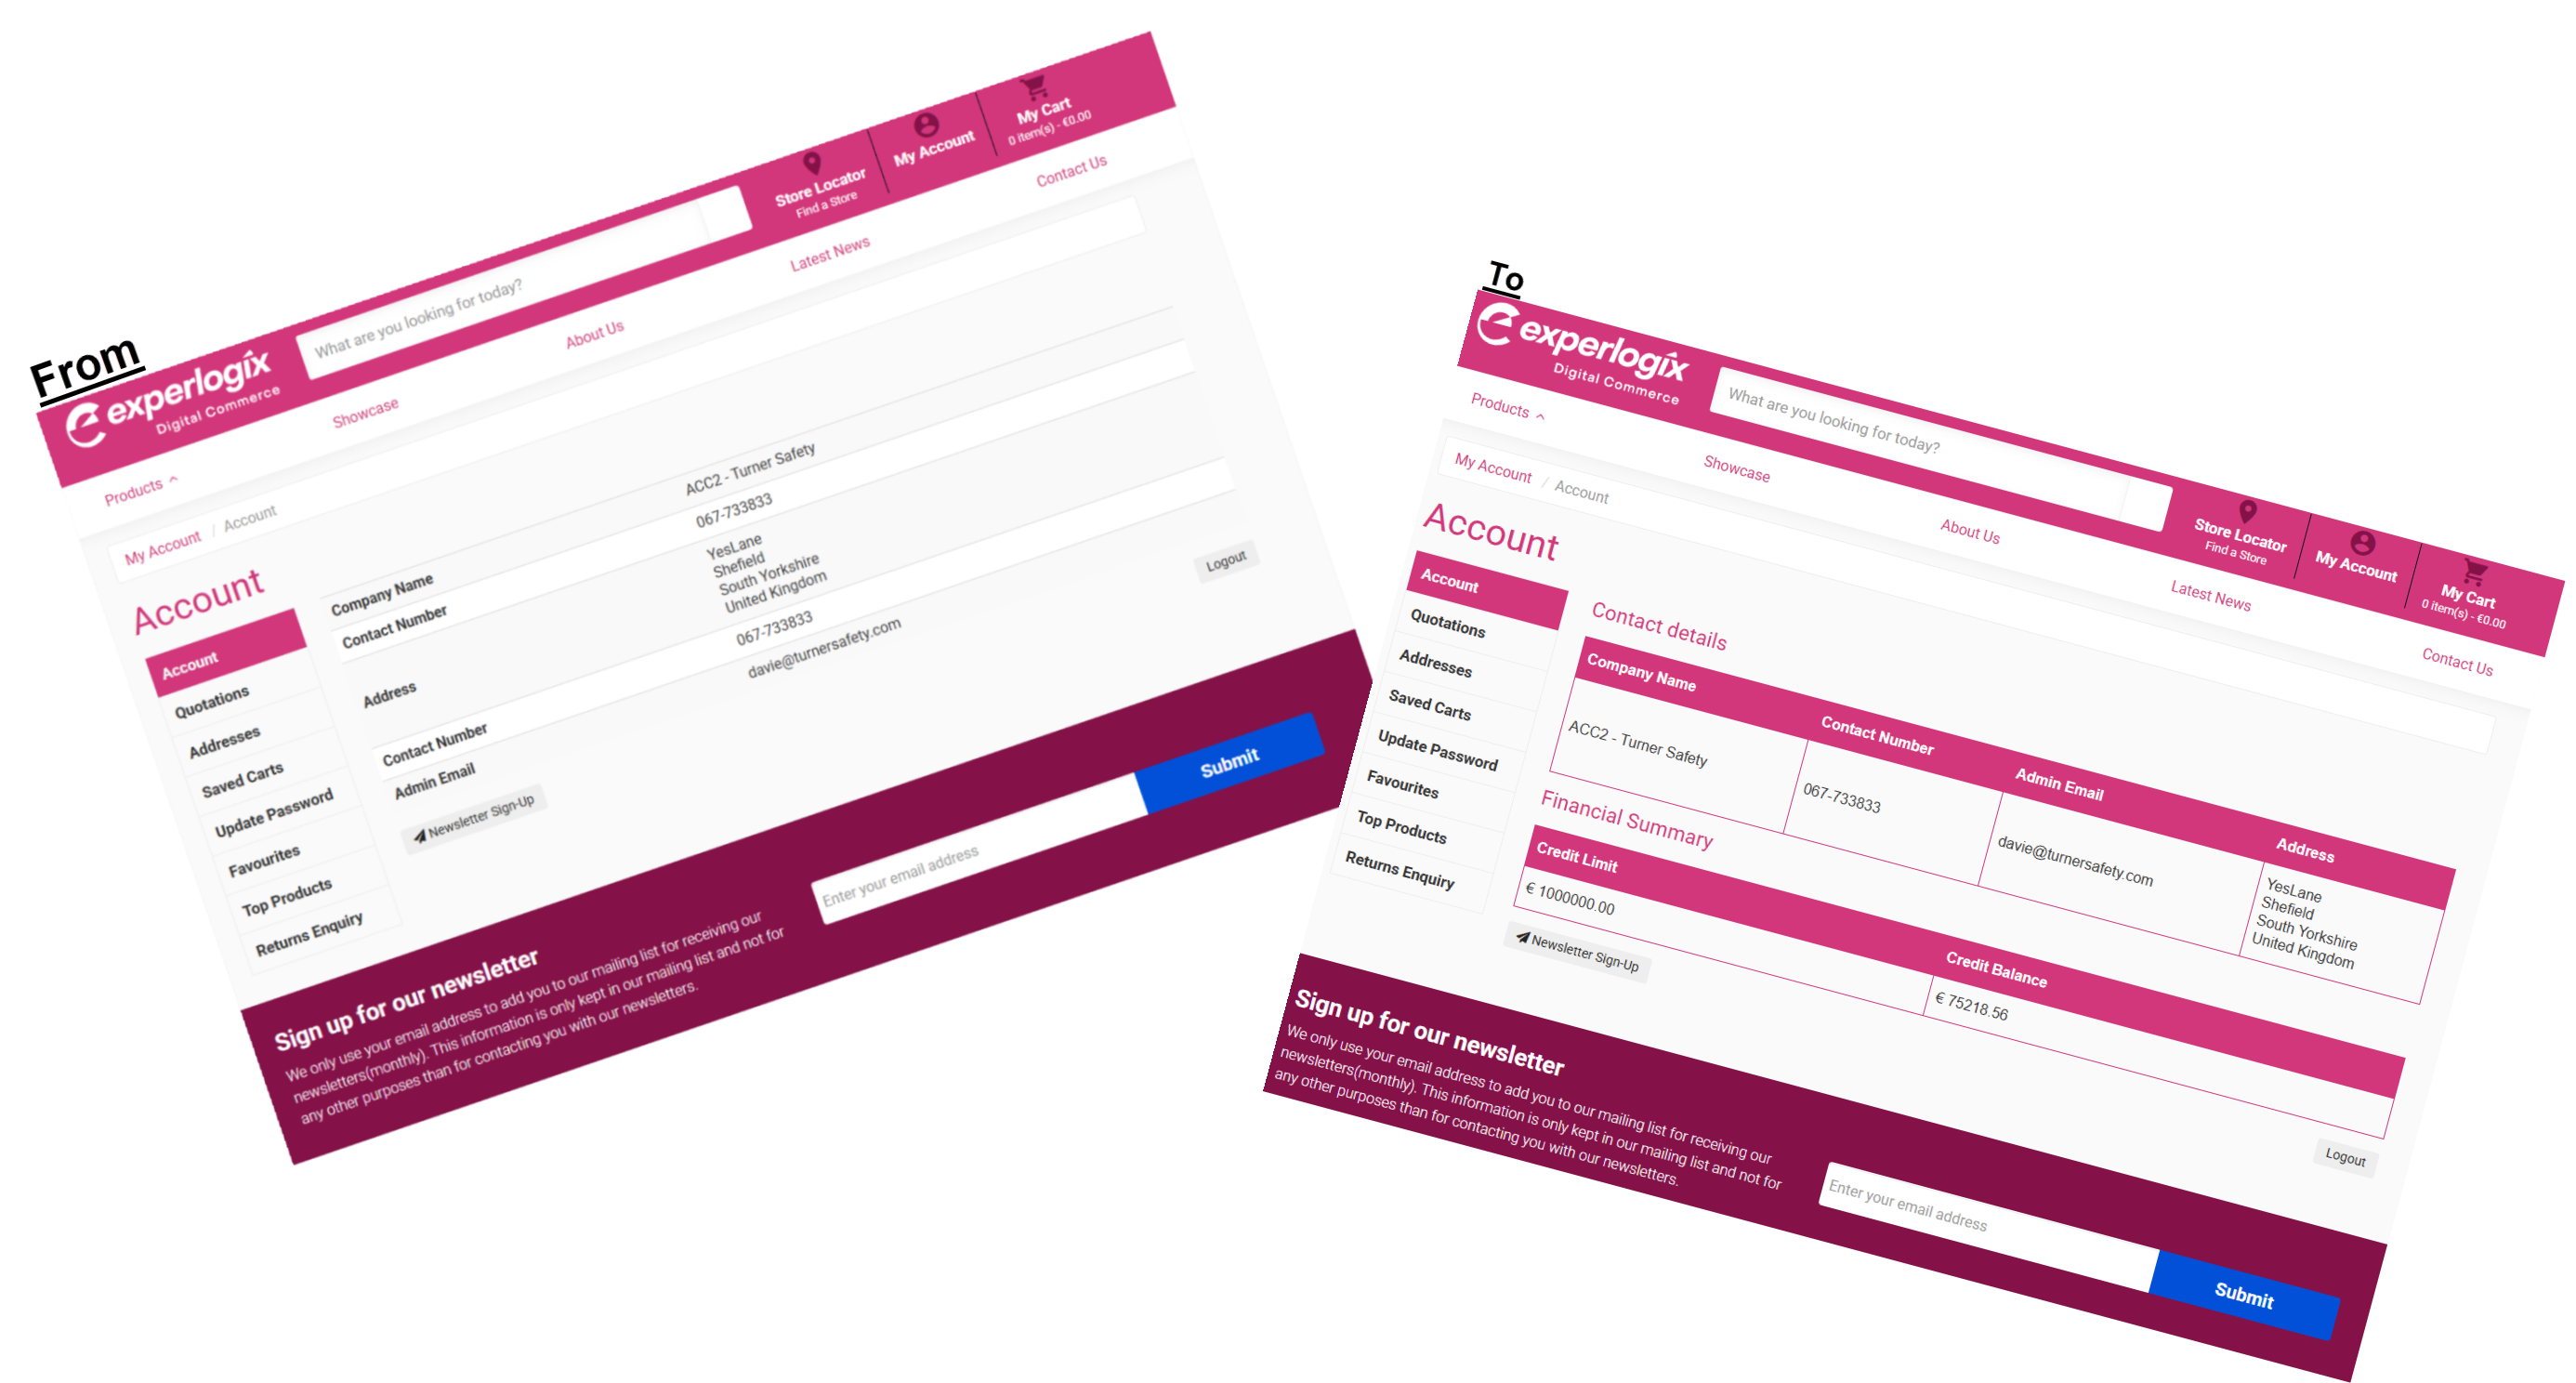
The Account Dashboard contains several data elements, such as your customer's company name, contact name, and details, that are typically displayed in a two-column table.
This use case demonstrates how to completely change the layout of the Account Dashboard while maintaining core functionality, such as the ability to change column names using our Translations feature.
Once you have saved your changes in WebShop, they are immediately visible in WebShop to your customers.
Key points
-
If you are comfortable with HTML, CSS, and variables, you’ll be in a good place to use this feature to achieve a personalized look and feel for your WebShop.
-
You are responsible for ensuring that the code you have written doesn’t adversely affect your WebShop.
Recipe
To change the layout of the Account Dashboard from what is typically implemented to a more tabular layout, as shown:
-
Open Templates in the Management Interface. This opens the Templates Editor.
-
Navigate to Templates->Dashboard and select “dashboard-main.twig”. This opens the existing twig code under the EDITOR tab.
-
Add the following code.
-
select Save to save your changes.
Twig code to change the Account Dashboard layout
<style>
    .company-table {
        width: 100%;
        border-collapse: collapse;
        margin: 16px 0;
        font-family: Arial, sans-serif;
    }

    .company-table thead {
        background-color: #d3377b;
        color: #ffffff;
    }

    .company-table th,
    .company-table td {
        padding: 12px 8px;
        border: 1px solid #d3377b;
        text-align: left;
    }

    .company-table tbody tr:nth-child(even) {
        background-color: #f9f9f9;
    }

    .company-table tbody tr:hover {
        background-color: #ffe6f0; /* subtle pink hover effect */
    }

    .company-table a {
        color: #d3377b;
        text-decoration: none;
    }

    .company-table a:hover {
        text-decoration: underline;
    }

    /* Responsive for small screens */
    @media screen and (max-width: 600px) {
        .company-table thead {
            display: none;
        }
        .company-table,
        .company-table tbody,
        .company-table tr,
        .company-table td {
            display: block;
            width: 100%;
        }
        .company-table tr {
            margin-bottom: 16px;
            border-bottom: 2px solid #d3377b;
        }
        .company-table td {
            text-align: right;
            padding-left: 50%;
            position: relative;
        }
        .company-table td::before {
            content: attr(data-label);
            position: absolute;
            left: 16px;
            width: calc(50% - 32px);
            font-weight: bold;
            text-align: left;
        }
    }
</style>

<h3>Contact details</h3>
<table class="company-table">
    <thead>
        <tr>
            <th>{{ translation('customer.dashboard.name') }}</th>
            <th>{{ translation('customer.dashboard.contactnum') }}</th>
            <th>{{ translation('customer.dashboard.contactemail') }}</th>
            <th>{{ translation('customer.form.address') }}</th>
        </tr>
    </thead>
    <tbody>
      <tr>
        <td data-label="Company Name">{{ (features.dashboard_show_account_code) ? (customer.Code ~ ' - ') : '' }} {{ service_call('name') }}</td>
        <td data-label="Contact Number">{{ service_call('phone') }}</td>
        <td data-label="Contact email address">{{ service_call('email') }}</td>
        <td data-label="Address">{{ service_call('address') }}</td>
       </tr>
    </tbody>
</table>

<h3> Financial Summary </h3>

<table class="company-table">
    <thead>
        <tr>
            <th>{{ translation('webshop.creditlimit') }}</th>
            <th>{{ translation('webshop.creditbalance') }}</th>
        </tr>
    </thead>
    <tbody>
        <tr>
            <td data-label="Credit Limit">
                {{ config.currency_symbol|raw }} {{ service_call('credit') }}
            </td>
            <td data-label="Balance Due">
                {{ config.currency_symbol|raw }} {{ service_call('balance') }}
            </td>
        </tr>
    </tbody>
</table>
Remember
-
You may have to select Clear Cache (

-
Select the DOCUMENTATION tab to view what objects and variables you can manipulate.
-
Select the LAYOUT tab to see where your twig code is displayed in WebShop.