Purpose and scope
To demonstrate how you can customize your account dashboard using the Templates Editor.
Watch
More information
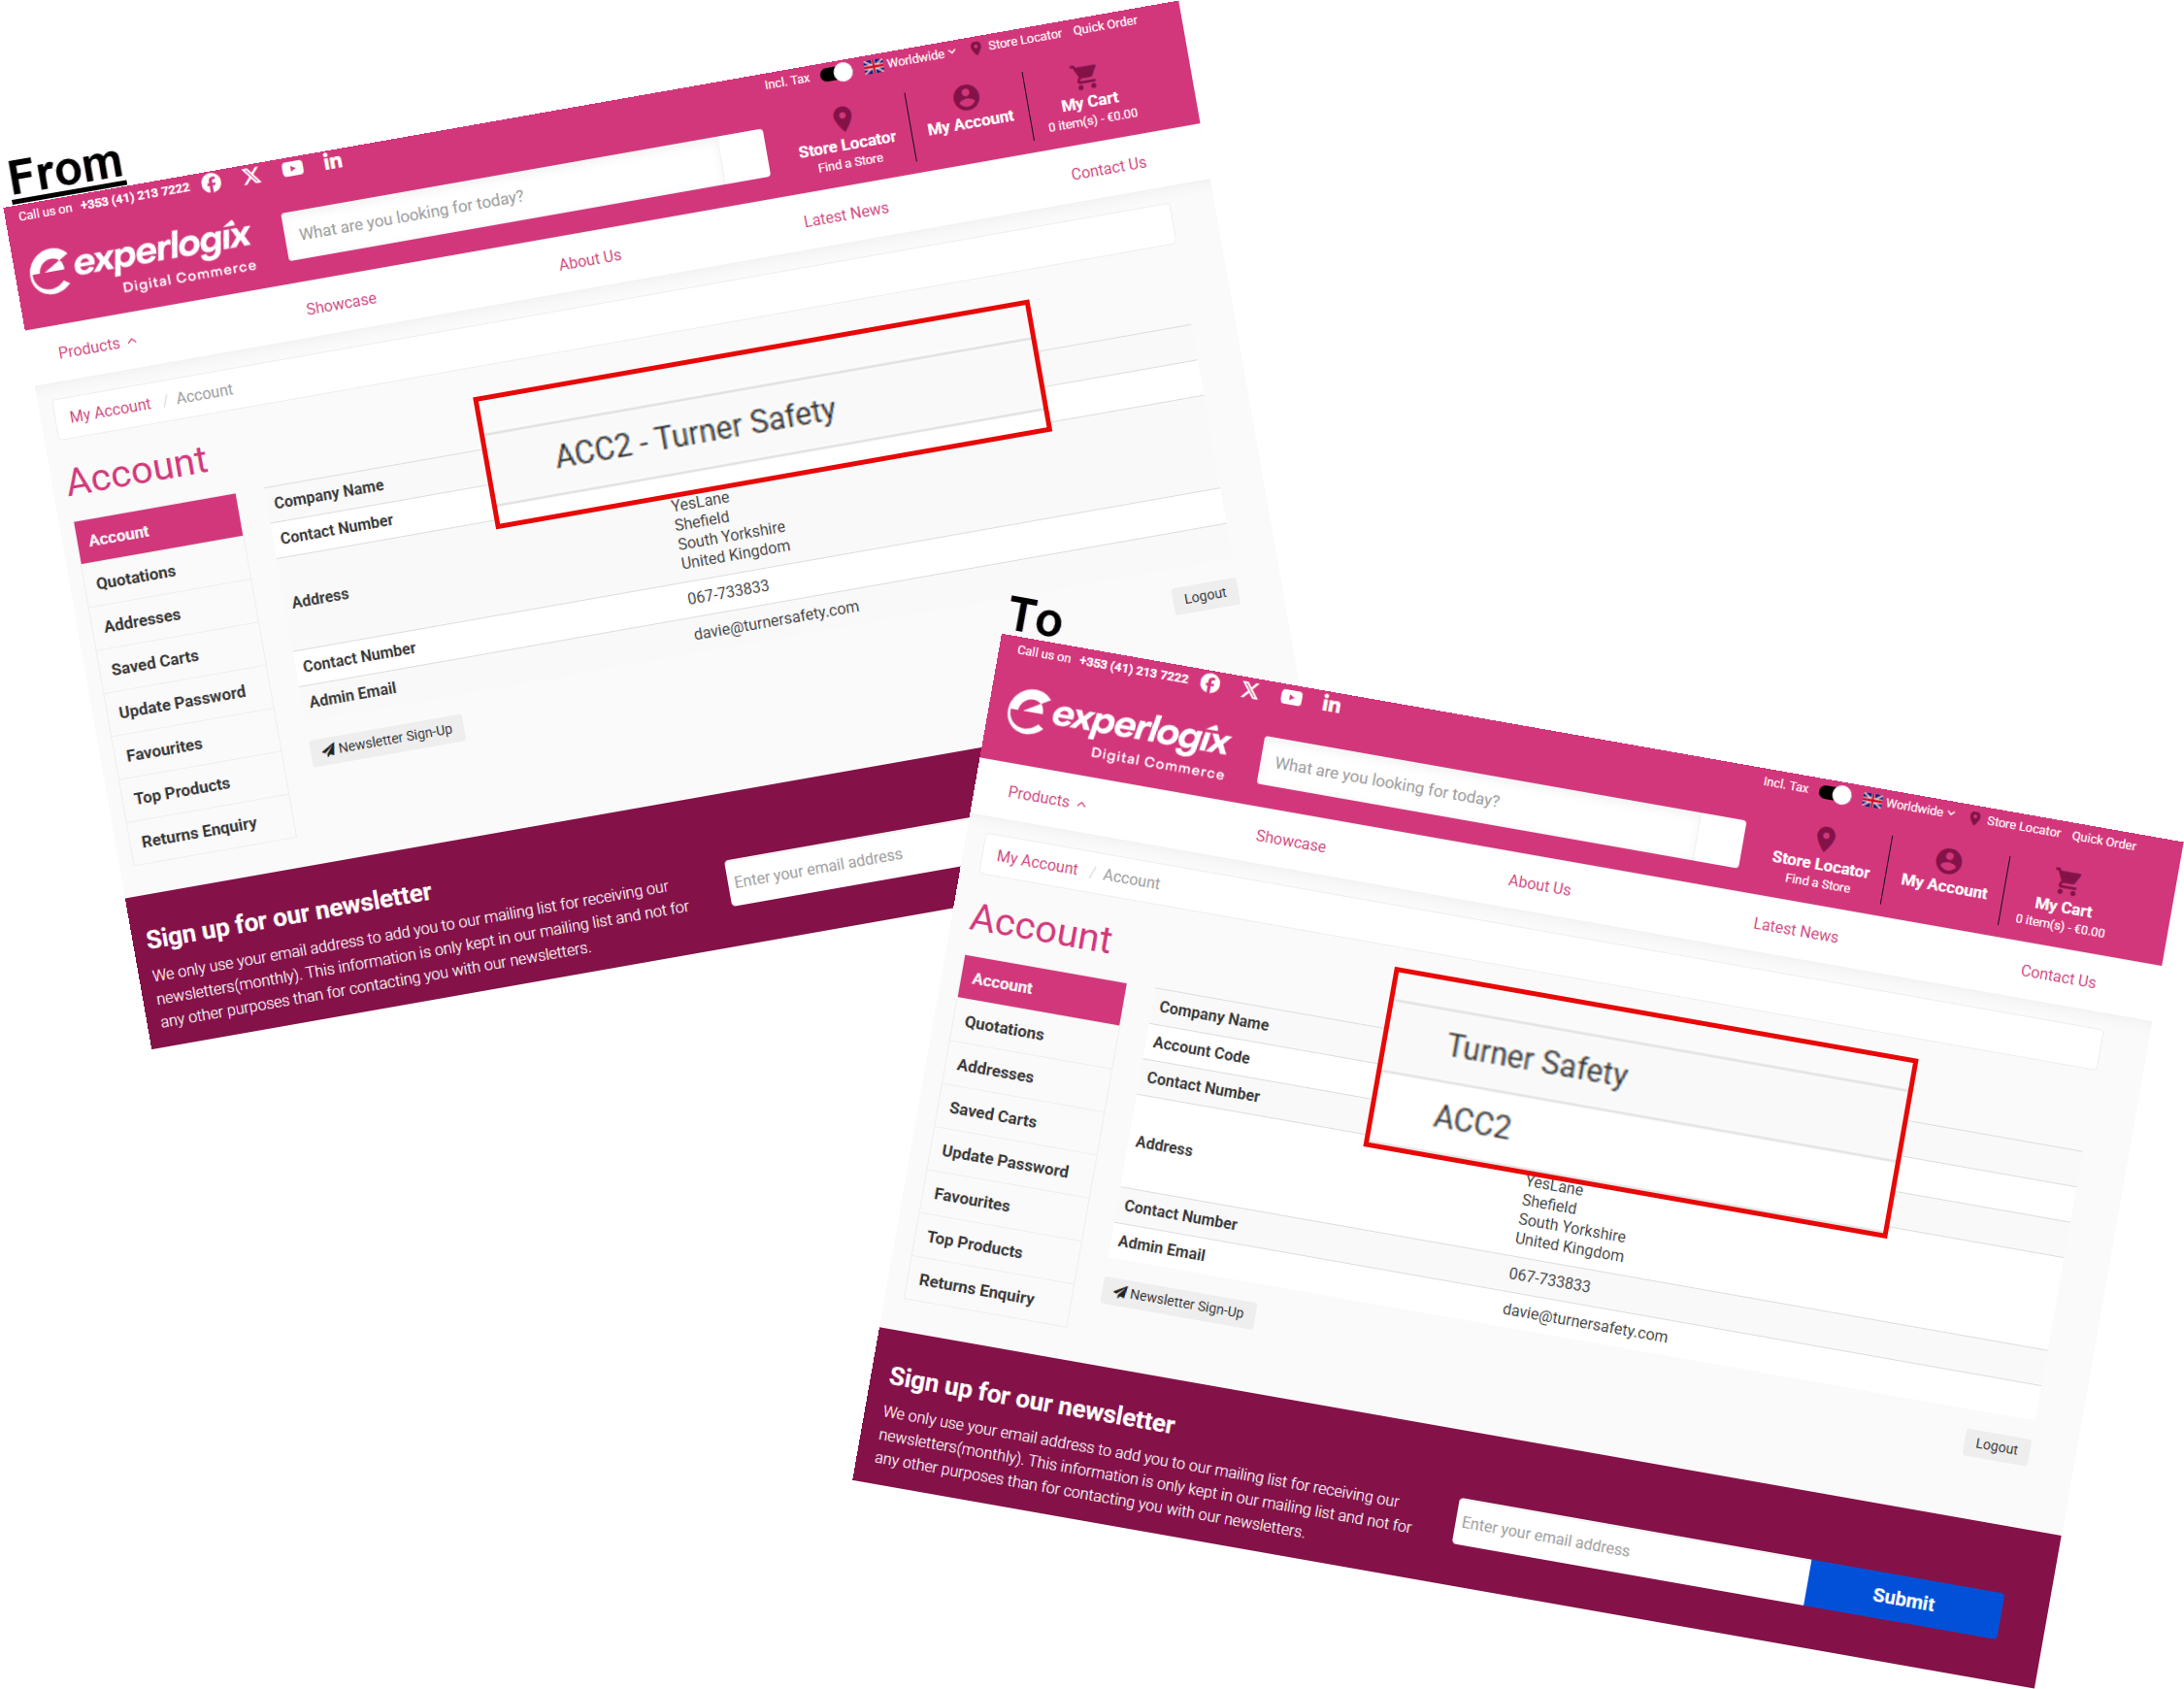
The Account Dashboard contains several data elements, such as your customer's company name, contact name, and account details.
This use case demonstrates how to add a row to the Account Dashboard and populate it with available variables and translations.
Once you have saved your changes in WebShop, they are immediately visible in WebShop to your customers.
Key points
-
If you are comfortable with HTML, CSS, and variables, you’ll be in a good place to use this feature to achieve a personalized look and feel for your WebShop.
-
You are responsible for ensuring that the code you have written doesn’t adversely affect your WebShop.
Recipe
To display the customer code and customer name on different rows, as shown:
-
Open Templates in the Management Interface. This opens the Templates Editor.
-
Navigate to Templates->Dashboard and select “dashboard-main.twig”. This opens the existing twig code under the EDITOR tab.
-
Add and modify Twig code to add an additional row to the Account Dashboard table and populate each row with the correct variable.
-
Select Save to save your changes.
Twig code to separate variables onto two rows in the Account Dashboard
From (existing code)
|
|
|---|
To
|
|
|---|
|
|
Remember
-
You may have to select Clear Cache (

-
Select the DOCUMENTATION tab to view what objects and variables you can manipulate.
-
Select the LAYOUT tab to see where your twig code is displayed in WebShop.