3-step Checkout
Audience
This article is relevant to you if you are an existing customer using our 3 step checkout process
This article describes how checkout using this process operates.
This feature has been replaced by our updated Checkout process, which offers a more streamlined checkout for your customers.
Purpose and scope
The Checkout process includes the following steps:
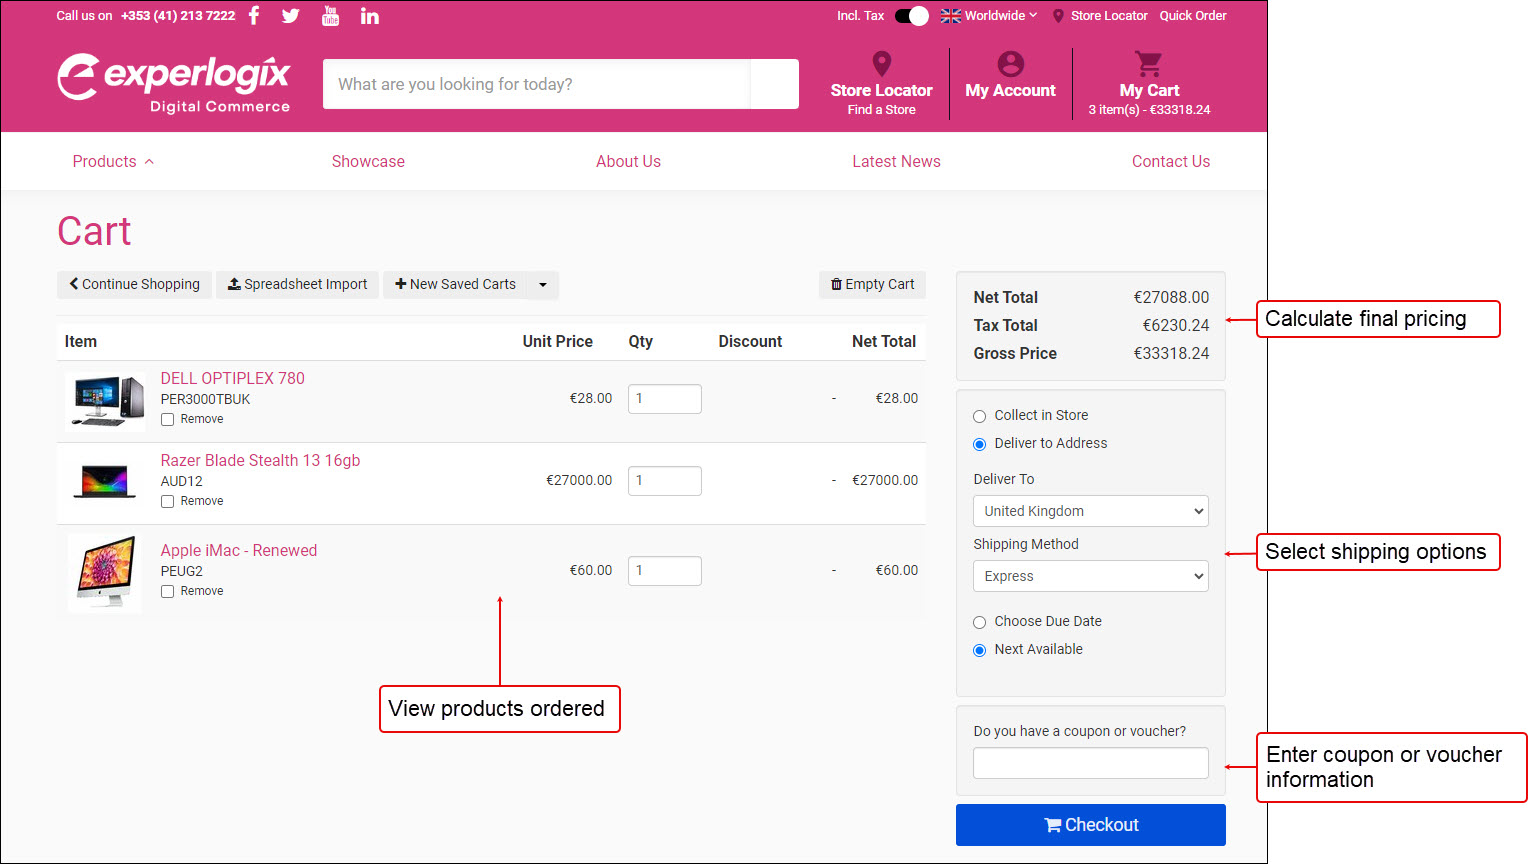
Calculate real-time pricing for products in the Cart
Select shipping options
Complete delivery information
Step by step

Calculate real-time pricing for products in the Cart
Click My Cart in the top-right corner of the screen once the order has been compiled. This opens the Cart and lists all products that have been added to the Cart.
Key points
Depending on features enabled, and how WebShop has been configured, each product can have different pricing rules associated with it.
Any Understanding multi-buy offers in WebShop that are available to your customer are displayed at the top of the screen. Update the Cart to take advantage of these offers.
Add any applicable Using vouchers and coupons in WebShop.
The final pricing for the order is calculated by applying any applicated vouchers or multi-buy offers and by retrieving the latest products in real-time from your ERP.
Select shipping options
Your customer specifies how they would like to get their order. Using Shipping services in WebShop, you can configure different shipping options and associated charges. Your customer may have to Update Cart if they change their shipping option, which may affect the final price of the order.
Complete delivery information
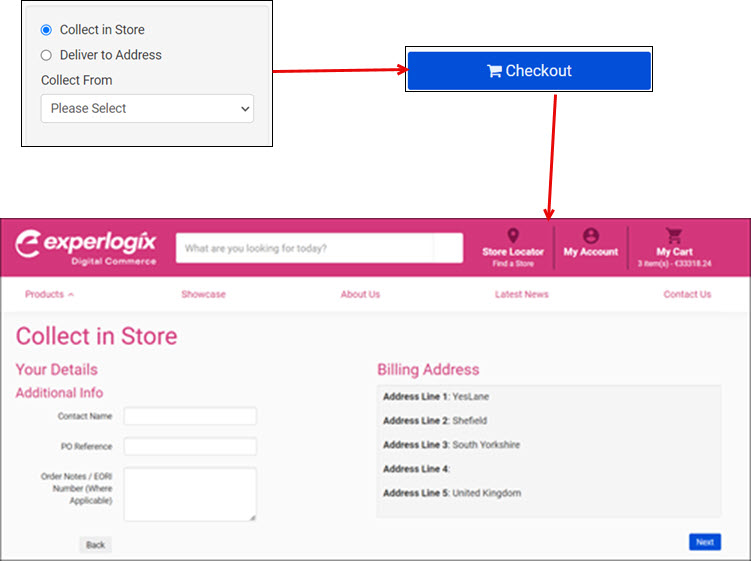
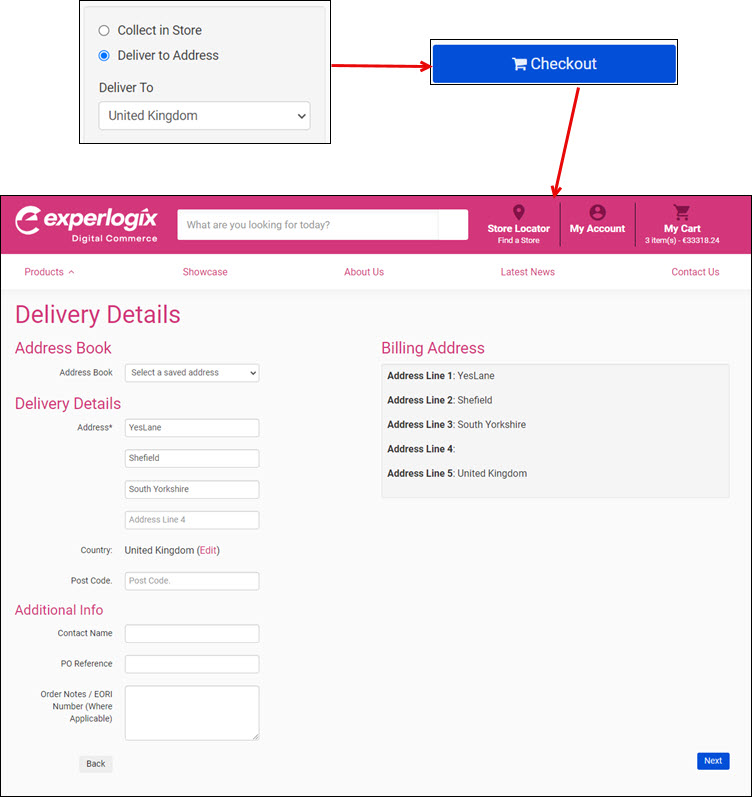
Once your customer is happy with their order, they click Checkout. Depending on the shipping option selected, one of the following screens are displayed:


