Skip table of contents

How do I set up an integration between Digital Commerce and Klaviyo?

Purpose and scope

The integration between Digital Commerce and Klaviyo allows Klaviyo access to your product catalogue and your customers' interactions with your WebShop. Once synced and consent has been given by your customer, Klaviyo uses your customers' interactions with WebShop to build profiles. From these profiles, you use the Klaviyo platform to build targeted marketing campaigns, and measure their success. For example, you could create a marketing flow that encourages your customers to convert items in a customer's cart into a sale by sending  "Abandoned cart" emails at configurable time periods.

Our built-in configuration tool guides you through creating a link between Digital Commerce and Klaviyo.

The purpose of this feature guide is to explain in detail how to use our built-in configuration tool to integrate Digital Commerce with Klaviyo. 

This feature is only available as part of the Digital Marketing SmartPack. Contact our sales team for more information.

Key points

  • You need to follow this procedure once to set up an integration between Digital Commerce and Klaviyo. 

  • Once it has been configured successfully, click here to find out how to manage and use this integration.

  • This step by step guide is intended to help you highlight the key settings you need to set so that your Klaviyo account is integrated successfully with Digital Commerce. It does not provide detailed descriptions for every step needed to either create or use Klaviyo effectively. Discover Klaviyo Academy1, which has many training courses on how to use Klaviyo effectively and is hosted externally. Note that we have no control over its contents.

Introducing terms and concepts used in this article

Term

Definition

Application Platform Interface

(API), which is an interface that allows two different computer systems interact with each other. It consists of a number of rules (also known as endpoints) that request data from the other system and receive and process responses from that system.

API key

a code used to identify and authenticate an application.

Enterprise resource platform

(ERP), a collection of your critical business operating systems, such as product, stock levels, financial, customers, suppliers and so on that run on the same platform.

Product code

(SKU), the unique code for the product.

Product feed

a structured description of your products that can be shared with other channels.

Uniform resource locator

(URL), the address of a website.

Step by step

Step 1: Log into Management Interface

Log in

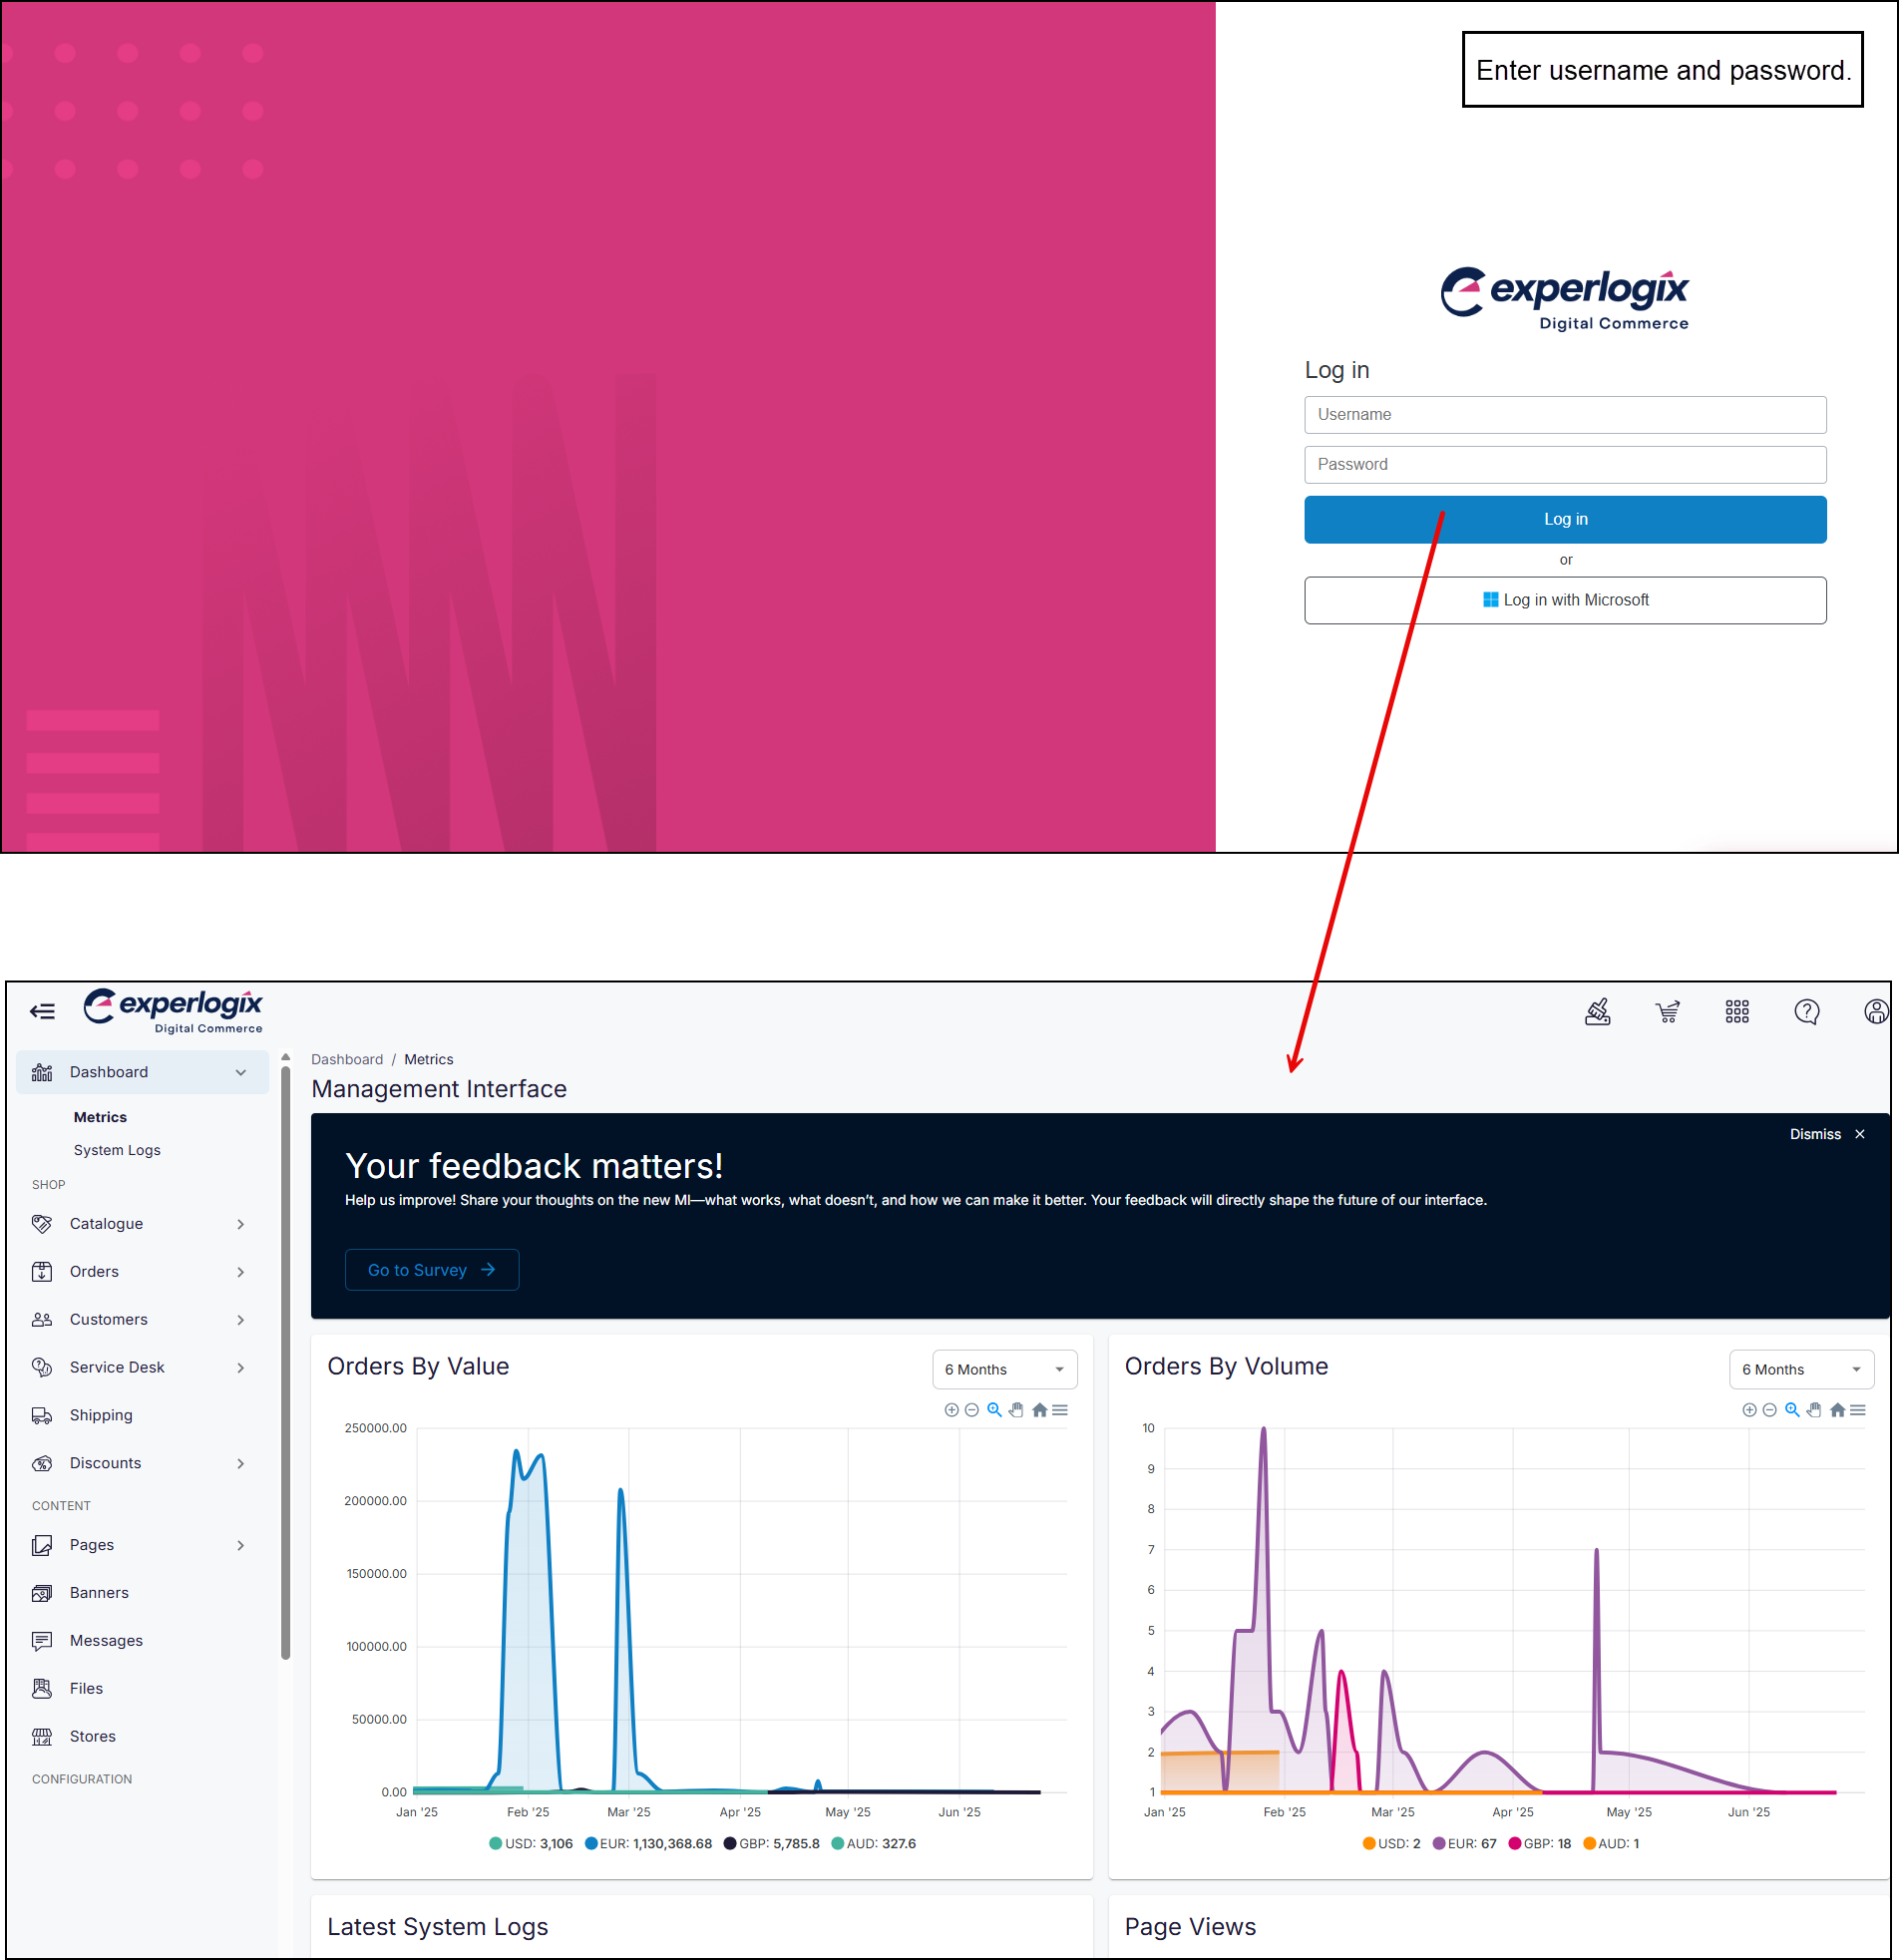
Log into Management Interface using your username and password. This opens the dashboard of your Management Interface.

LogIntoManagementInterface.jpg

Step 2: Open Tools

Open

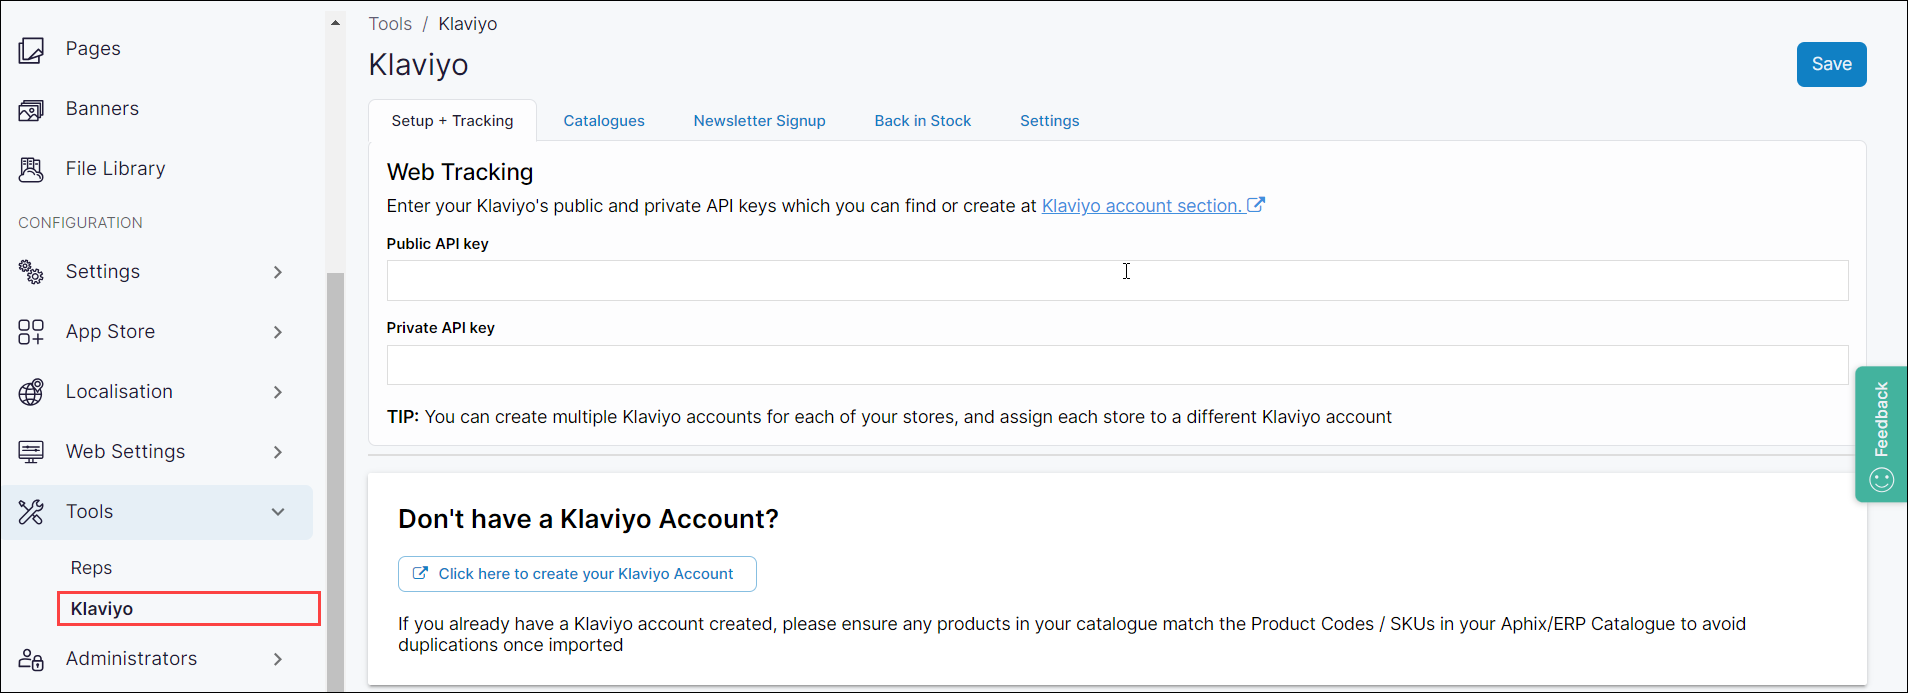
Click Tools under Configuration in the left side bar menu.

Click Klaviyo from the list of options. This opens the configuration tool that allows you to set up and configure the integration between Digital Commerce and Klaviyo.

Step 3: Create a Klaviyo account

Create

Recommendations

  • We recommend that you create a new Klaviyo account to become familiar with many of features that this integration provides, such as how to import your product catalogue, how to register customers and so on.  When familiar with its features and how they work in conjunction with your WebShop, you can re-assign the account to an existing Klaviyo account in your Klaviyo settings.

  • You may already have a Klaviyo account, which you can link with your WebShop. If you do use an existing account, make sure to use the same product codes / SKU in both systems. Using the same product codes avoids duplication in your Klaviyo account.

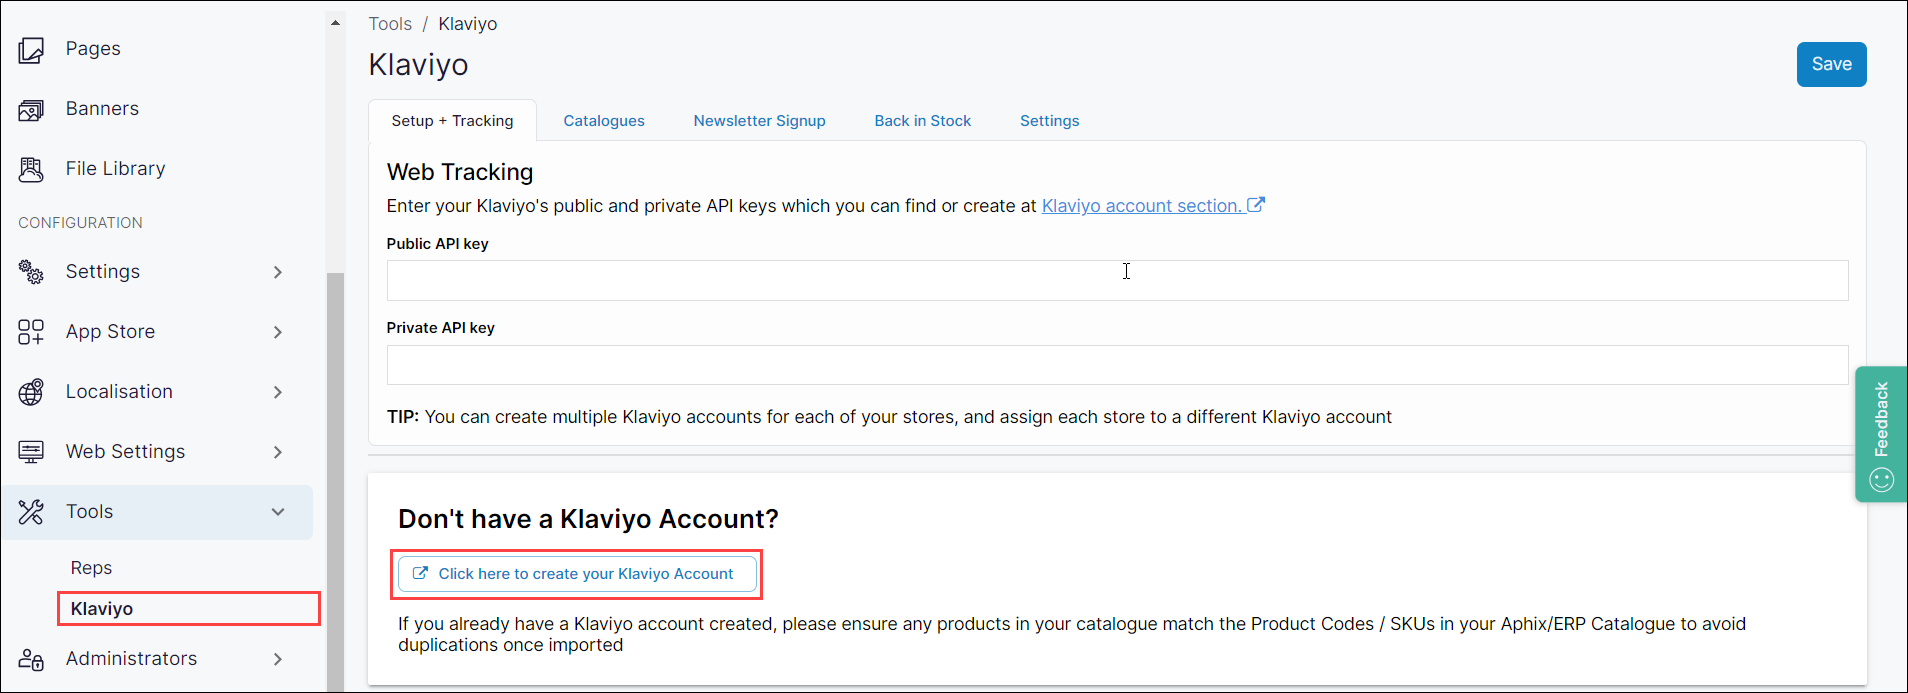
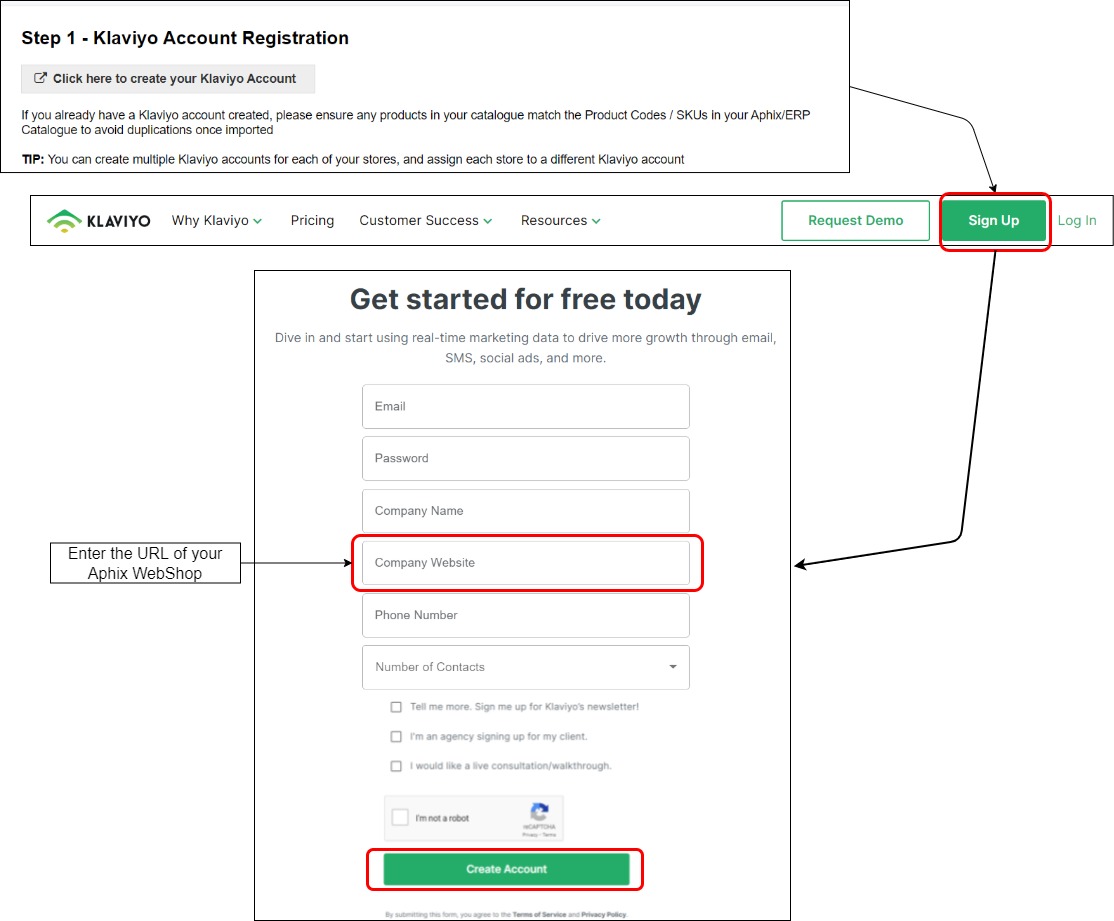
  • Click “Create here to create Klaviyo Account“.

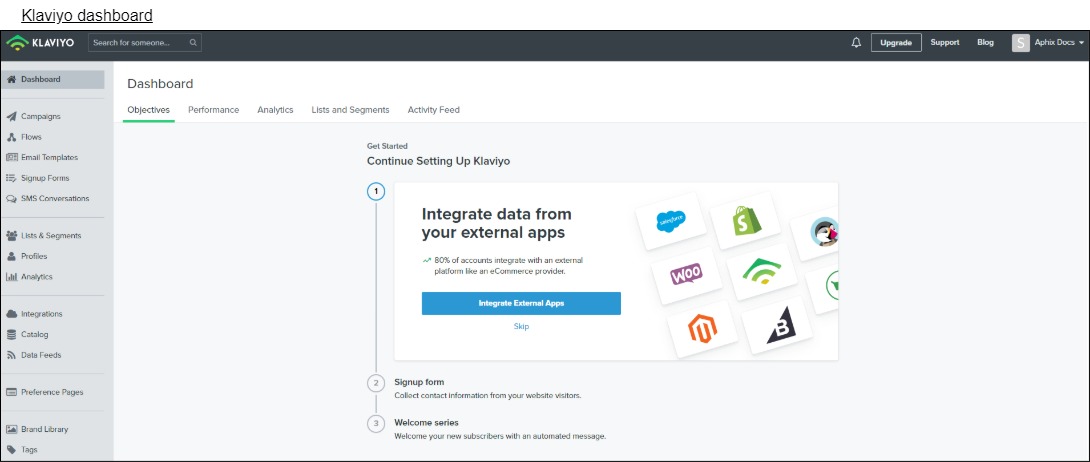
This opens a new browser window which allows you to create and configure a Klaviyo account.

  • Once you click Create Account, you are guided through Klaviyo's sign up process. During this process, you are asked for business information and the sender's name and email address which will be displayed in your subscriber's Inbox. You'll need to verify the sender's email, and then your Klaviyo's account will be verified and you will be given access to its dashboard.

Step 4: Add your product catalogue

Add

Key points

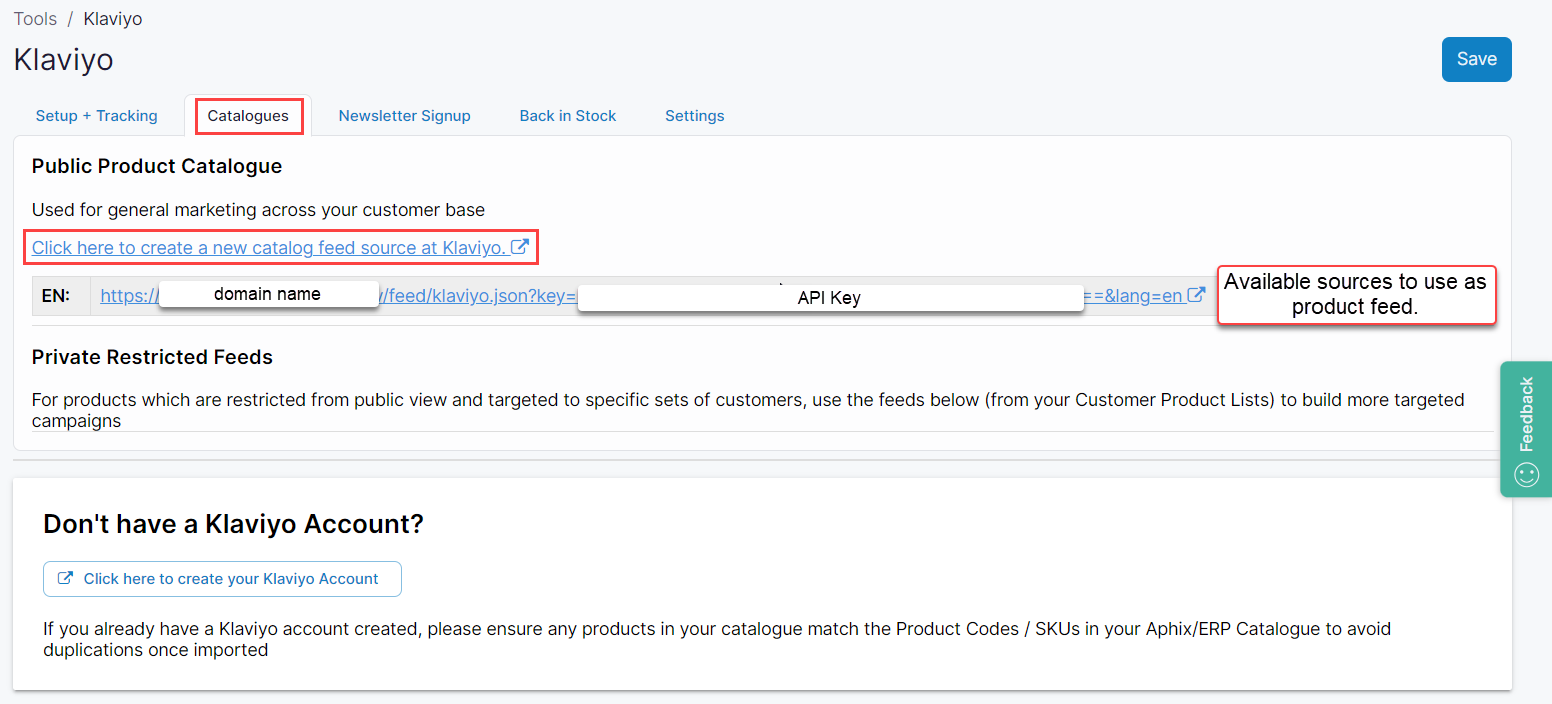
  • Select the most appropriate source to use as your product feed. You may have a number of available sources, especially if you have multiple WebShops or one WebShop with multiple languages.

  • Always use your domain name rather than the AWS URL.

  • The product feed takes product properties that have been uploaded into WebShop and imports them in Klaviyo.

    • Properties imported include product SKUs, titles, descriptions and images.

    • The price that is imported is the public-facing price listed your WebShop.

    • The category that a product is found under is also imported. If a product is found under multiple categories, all categories associated with the product are imported.

  • Click the Catalogues tab.

  • Click “Click here to create a new catalog feed source at Klaviyo“. This opens your Klaviyo dashboard on the custom source screen.

  • In Klaviyo,

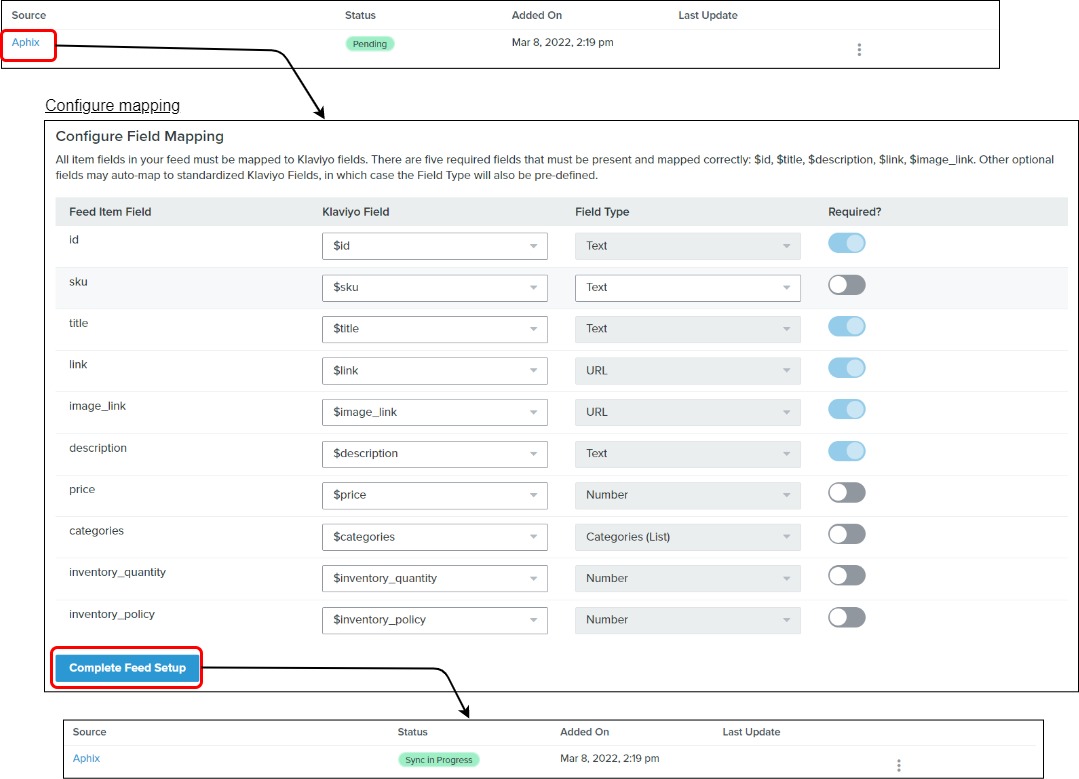
    • Enter the name of the product feed, and paste the product feed URL that you have copied from the Settings page in Management Interface. 

    • Click Define Source. This creates a link between your WebShop product catalogue and the Klaviyo platform.

    • To view or configure the fields that are shared between the two systems, click on the source name. In this example, click Aphix. 

    • Click Catalog on the Klaviyo dashboard to view the products that have been synced. 

Step 5: Web tracking 

Track

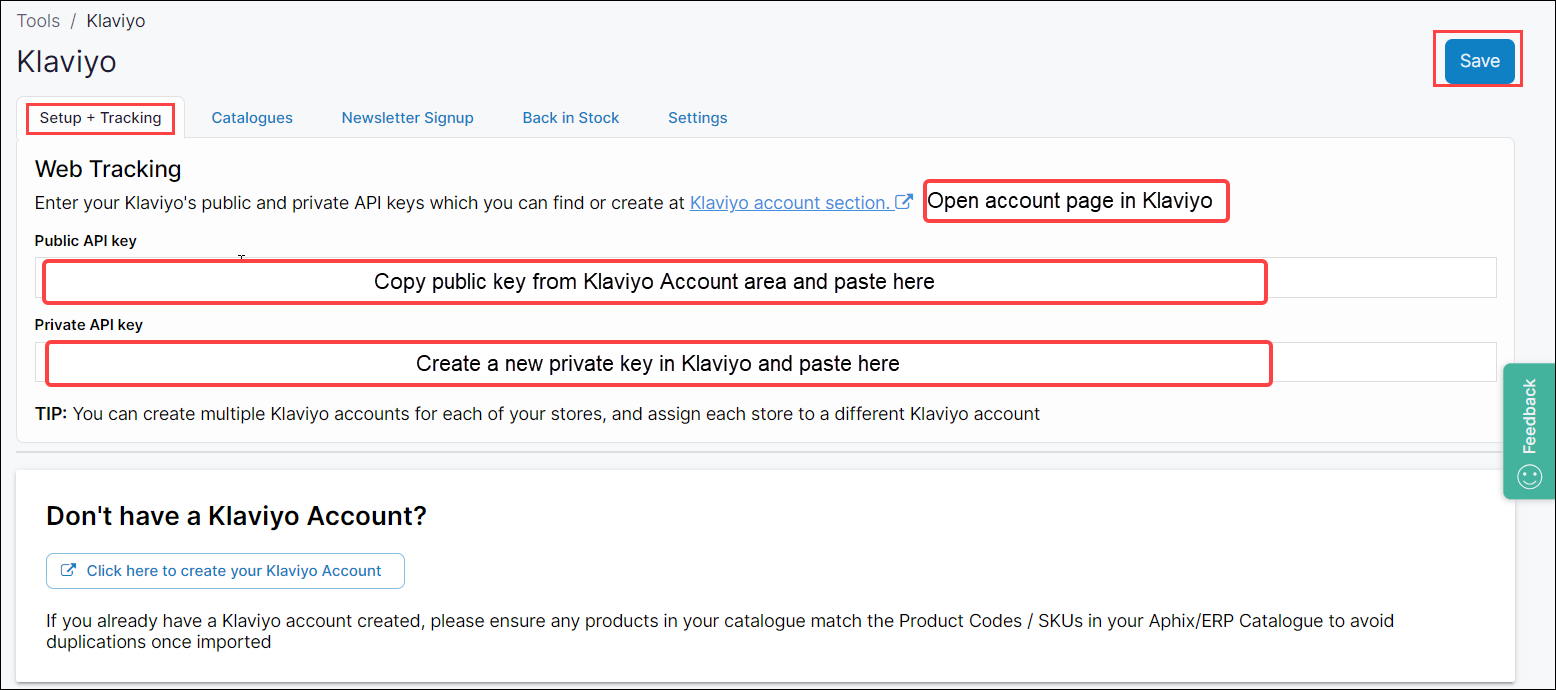
To avail of Klaviyo's many automated features, such as their "Abandoned cart" email automation, you'll need to enter a public and private API key under Web Tracking. This links Digital Commerce with Klaviyo, and allows sensitive information, such as customer information and their cart contents, be shared securely.

  • Click the Setup + Tracking tab.

  • Click “Klaviyo account section“. This opens your Account page in Klaviyo. 

  • Copy the public API key and paste it into the Public API key field in Management Interface under Web Tracking.

  • Click Create Private API Key in Klaviyo Account, copy it and paste it into the Private API key field in Management Interface under Web Tracking.

  • Click Save on the top right of the screen.

References

1 External site: Klaviyo Academy

JavaScript errors detected

Please note, these errors can depend on your browser setup.

If this problem persists, please contact our support.