Skip table of contents

How can my customers create a web account?

Purpose and scope

Perhaps you would prefer to provide your customers with the ability to set up their own web account. A web account is a WebShop account that provides your customers with access to their WebShop dashboard and other features, such as viewing online order history, saving orders for future use. A web account is not synchronized with your ERP.

This article explains what your customers must do to manually create a WebShop web account.

Introducing terms and concepts used in this article

Term

Definition

Web account

a WebShop account that provides you with WebShop functionality, such as viewing online order history, saving carts for future use or save delivery and billing addresses, which is not synchronized with your ERP.

Step by step

  • Click My Account, located in WebShop’s header.

    CreateWebAccount-Header.png

    This opens the Account Login / Register screen.

CreateWebAccount-SignUp.png
  • Click “Click here to sign up for an account”. This opens the Account Register screen.

As a merchant, you have three options on this screen.

  • Option 1: Sign up online

  • Option 2: Sign up using a pre-configured email template

  • Option 3: Sign up using a CMS page

As standard, Options 1 and 2 are provided, with the ability to change the button names using Translations. However, with a small amount of effort and configuration, you can have a unique registration form using Pages, our content management system.

  • Option 1: Sign up online

Sign up

When your customer clicks “Sign up online“, they are presented with a registration form. Once they have completed the form, their web account is set up in Management Interface, and they have immediate access to their WebShop dashboard.

  • Option 2: Sign up using a pre-configured email template

Sign up via email

This opens a pre-configured email template requesting your customers to complete their information. Your customer completes the form and clicks Send.

CreateWebAccount-Email.png

Once you receive the email, you can set up the web account on your customer’s behalf.

Note

“Contact us” is a button name that can be updated using Translations. Open Localisation → Translations, find “webshop.login.needaccount.b2b.signup.button“ and update it as required.

  • Option 3: Sign up using a CMS page

Sign up via CMS page
Set up in Management Interface (Merchant action)
  1. Create the CMS page.

Alternatively, create and use a Wufoo form to capture the information you require. Read Integrating Wufoo forms for more information.

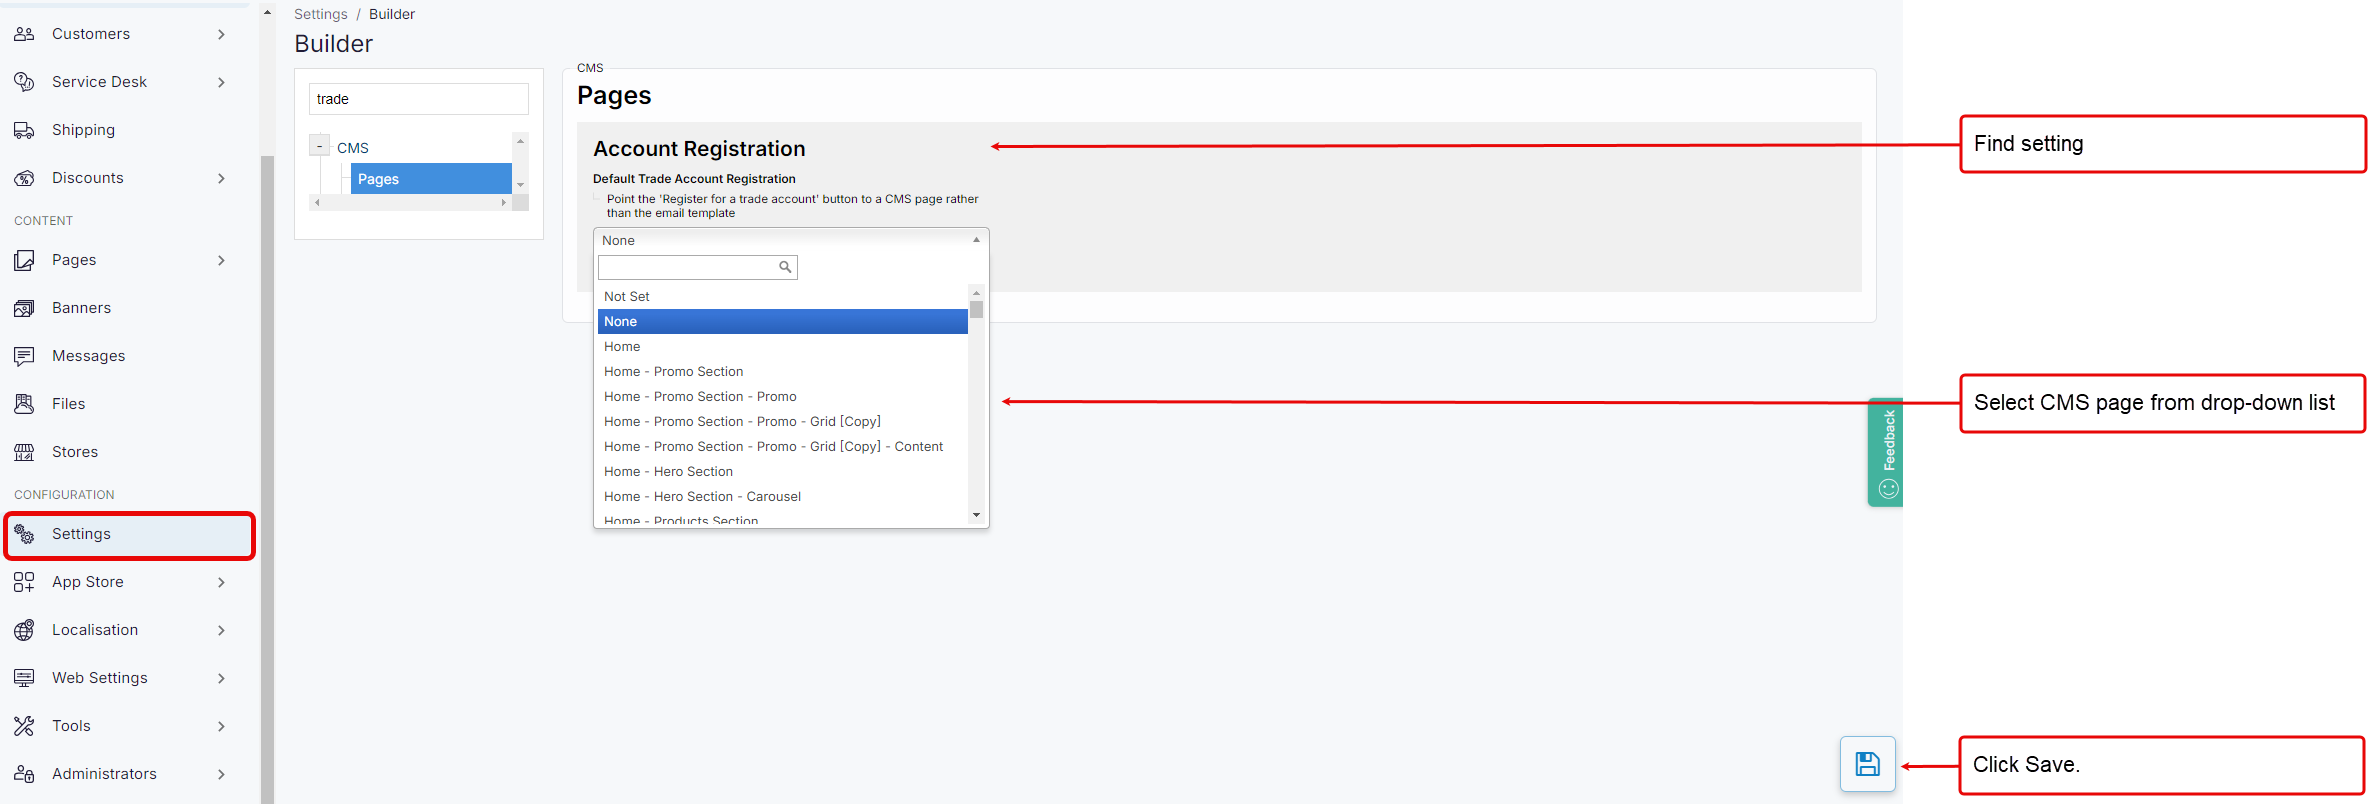
  1. Link the newly created CMS page with Account Registration setting in Settings.

    CreateWebAccount-CMSPage.png

  2. Update the “Contact us” button in WebShop to a more appropriate name if required; for example, you could change it to “Register for web account“.

Note

“Contact us” is a system message that can be updated using Translations. Open Localisation → Translations, find “webshop.login.needaccount.b2b.signup.button“ and update it as required.

Use in WebShop (Your customers)

When your customer clicks the button, the linked CMS page is displayed. Your customer completes the page and submits it. Once you receive the information, you can set up the web account on your customer’s behalf.

JavaScript errors detected

Please note, these errors can depend on your browser setup.

If this problem persists, please contact our support.