Purpose and scope
Your customers may wish to view or print invoices or credit notes from their WebShop account or pay a specific invoice balance.
This article provides a step-by-step guide on how to carry out these actions from their WebShop account.
Step by step
Step 1: Log into WebShop
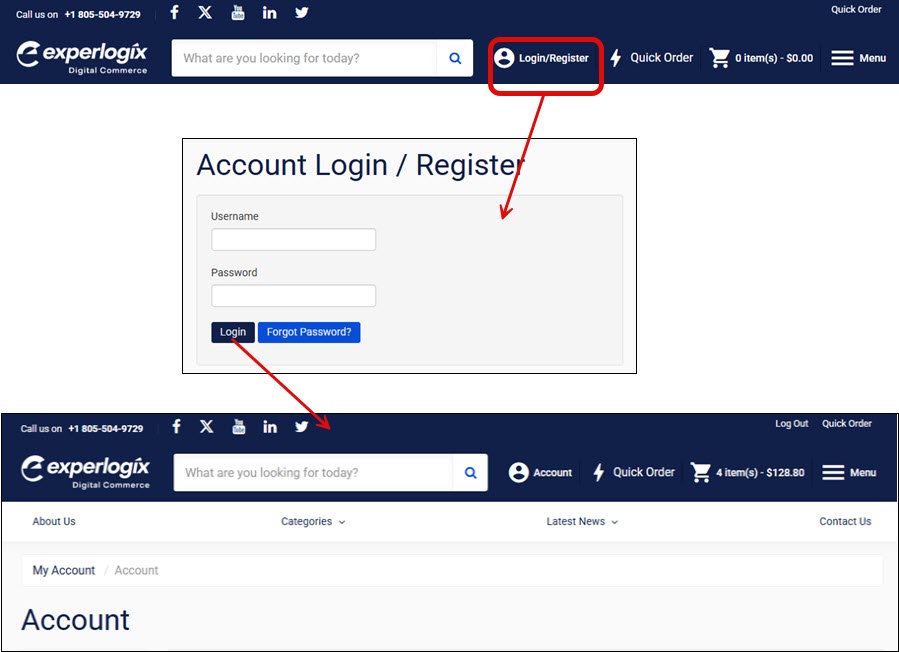
Log in
Log into WebShop with your username and password. This opens WebShop's dashboard.
Step 2: Open “My Account“
Open
Click My Account to display the account details screen. This screen contains details of your account, as shown.

Step 3: View Finance
View
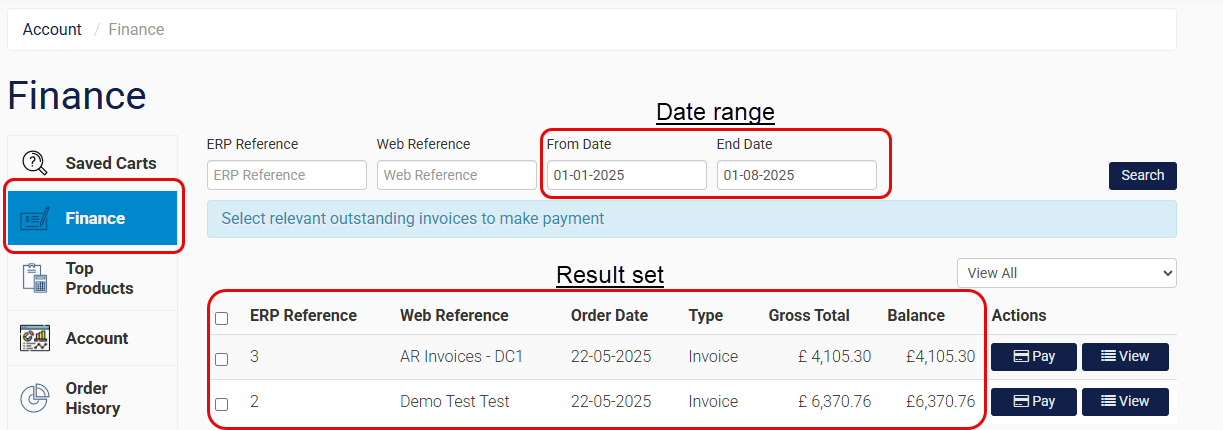
Select Finance in the left menu bar. This opens a list of transactions made using this customer’s account.

Actions available
-
Filter the list of transactions by ERP reference, web reference, or date range.
-
Filter the list of transactions using the dropdown box on the right of the screen.
-
View details for a specific transaction using the View dialog box beside the
-
Pay an invoice.
Integrated with Intact iQ?
-
Retrieve delivery documents for specific invoices by selecting the ‘truck’ icon to the right of the invoice, as shown:
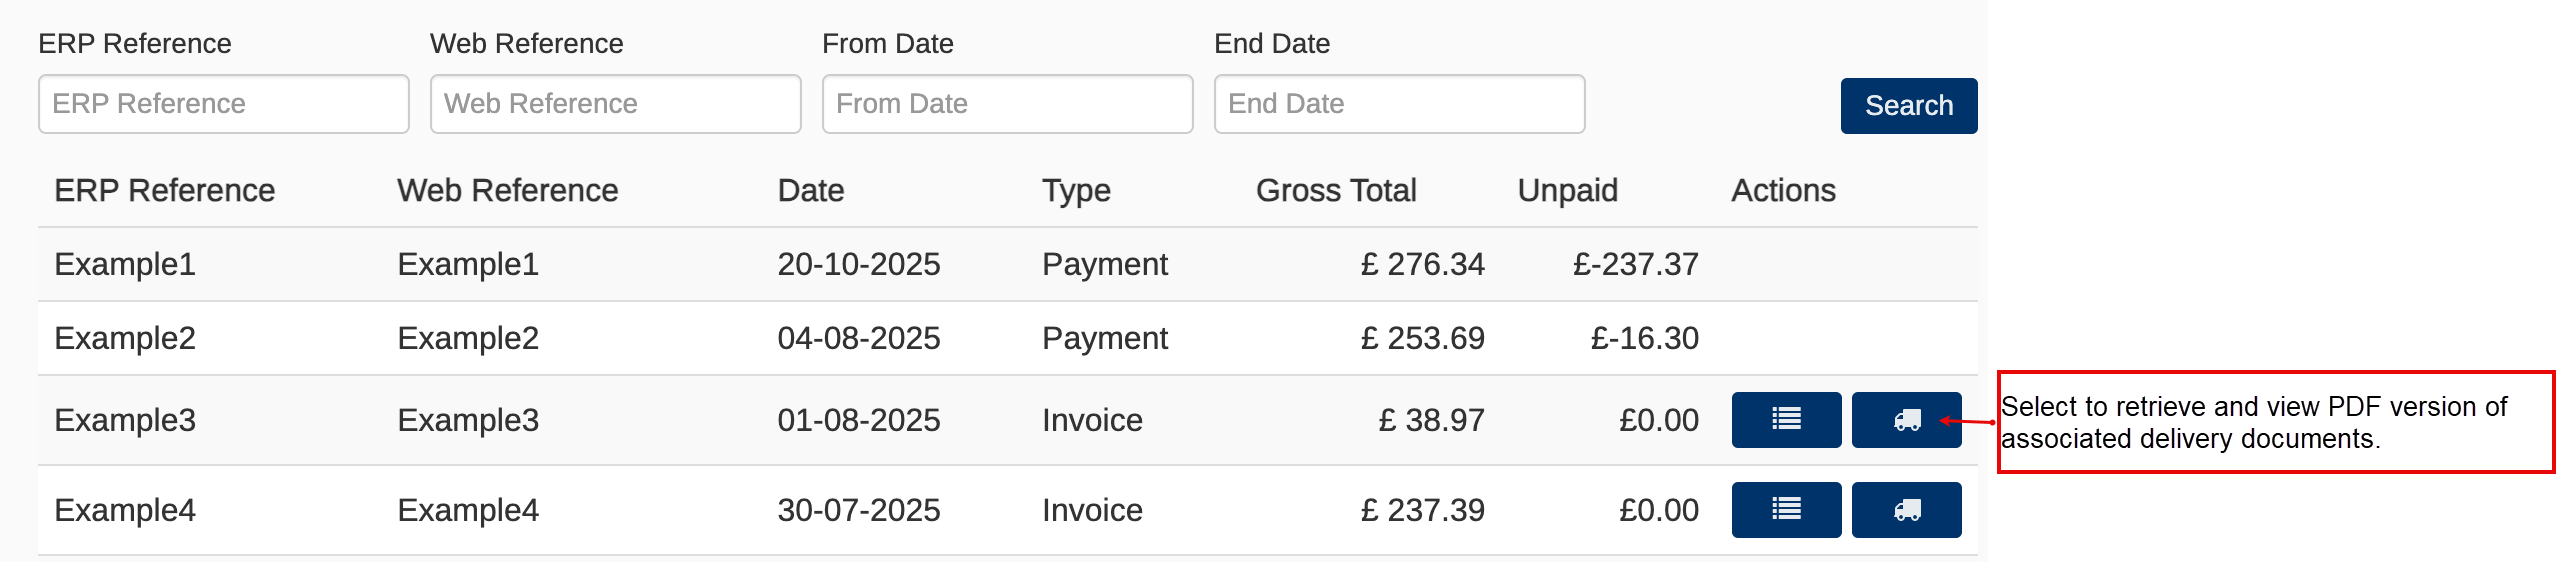
To enable it, you must have the “Documents“ endpoint enabled in Intact iQ, and then contact our Support team to activate it.
Actions available
Filter by field
Using the input boxes at the top of the screen, filter by ERP reference, web reference or date range.
Example
The transaction list has been filtered by date range; only those transactions made in 2025 are included in the result set.
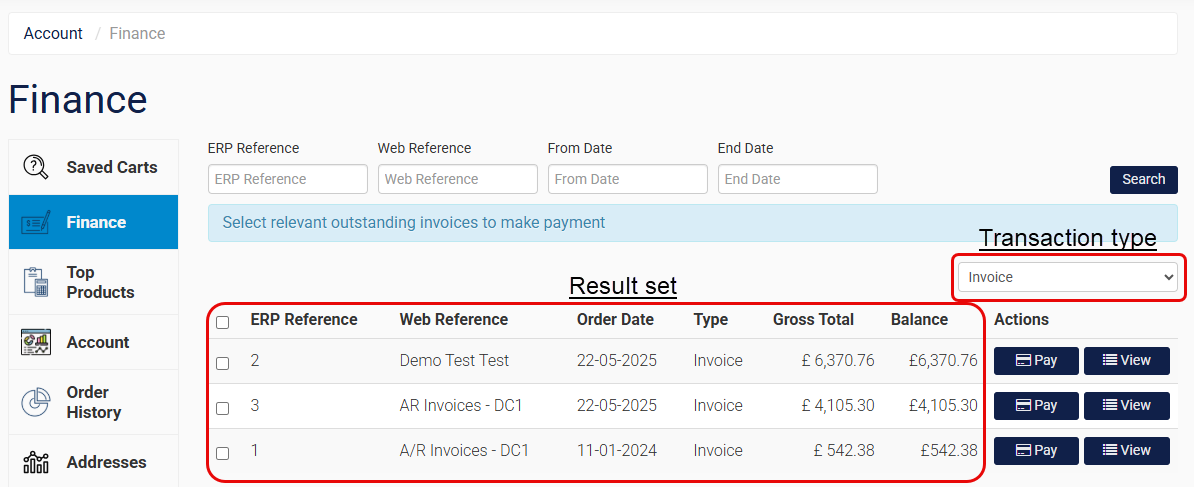
Filter by transaction type
Filter the list of transactions using the dropdown box on the right of the screen.
Example
The transaction list has been filtered by Invoice; only Invoices are included in the Result Set.
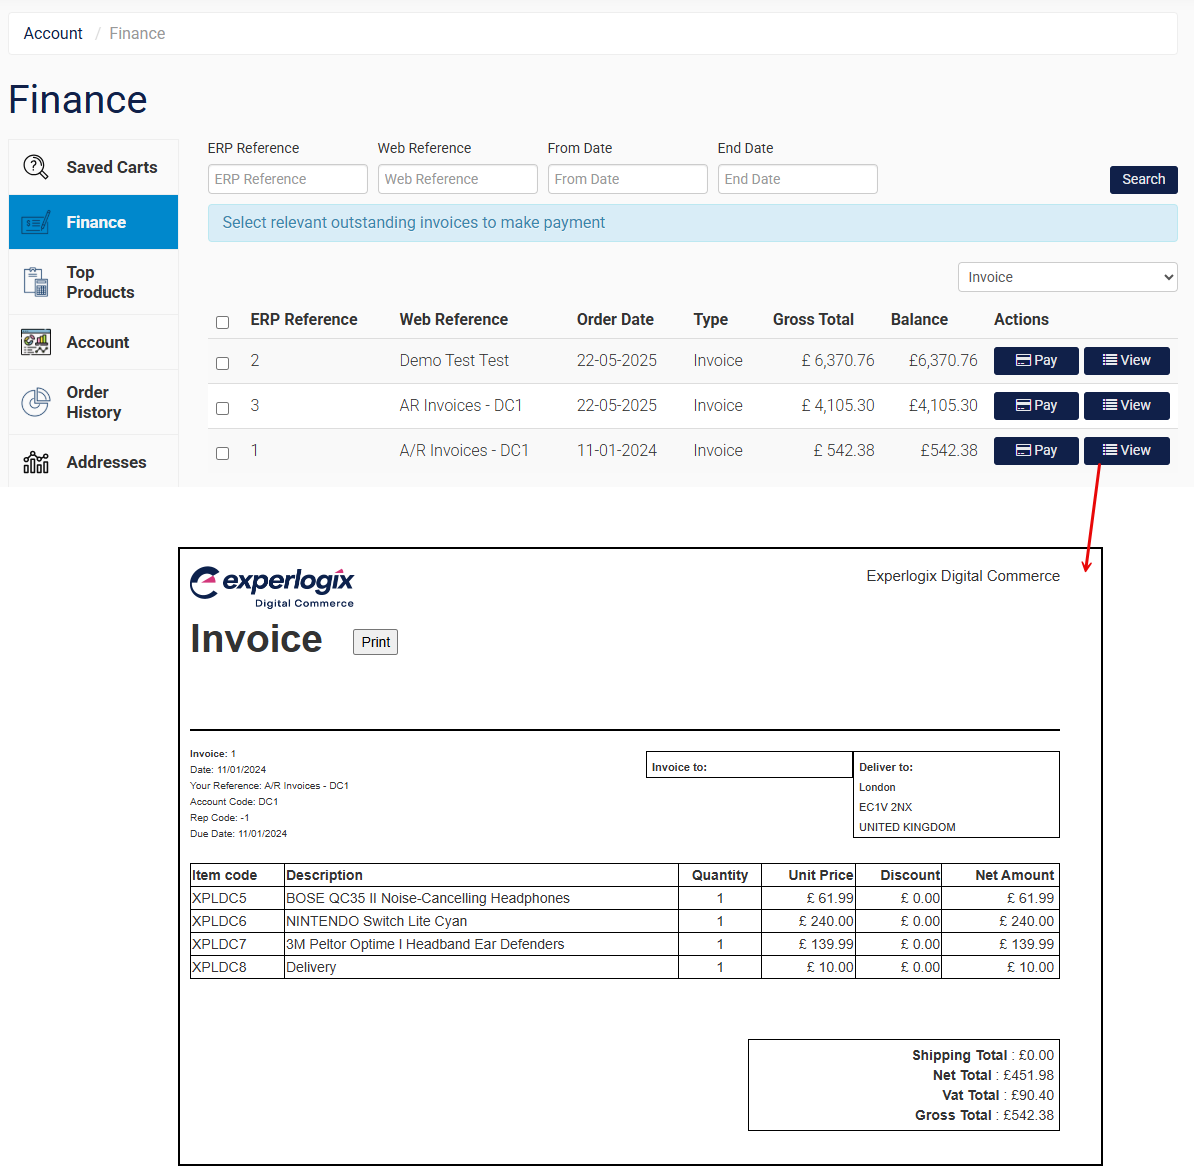
View
Select View to the right of the specific transaction you wish to view.
Key points when viewing credit notes
-
If WebShop is integrated with SAP Business One or Microsoft Dynamics 365 Business Central, the credit note is displayed using a standard template stored within WebShop.
-
Credit notes are retrieved as PDF files from Intact iQ. The credit note is displayed using the style contained in the PDF.
Example
Select View to the right of the invoice whose web reference is A/R Invoices-DC1. This opens the details of this invoice.
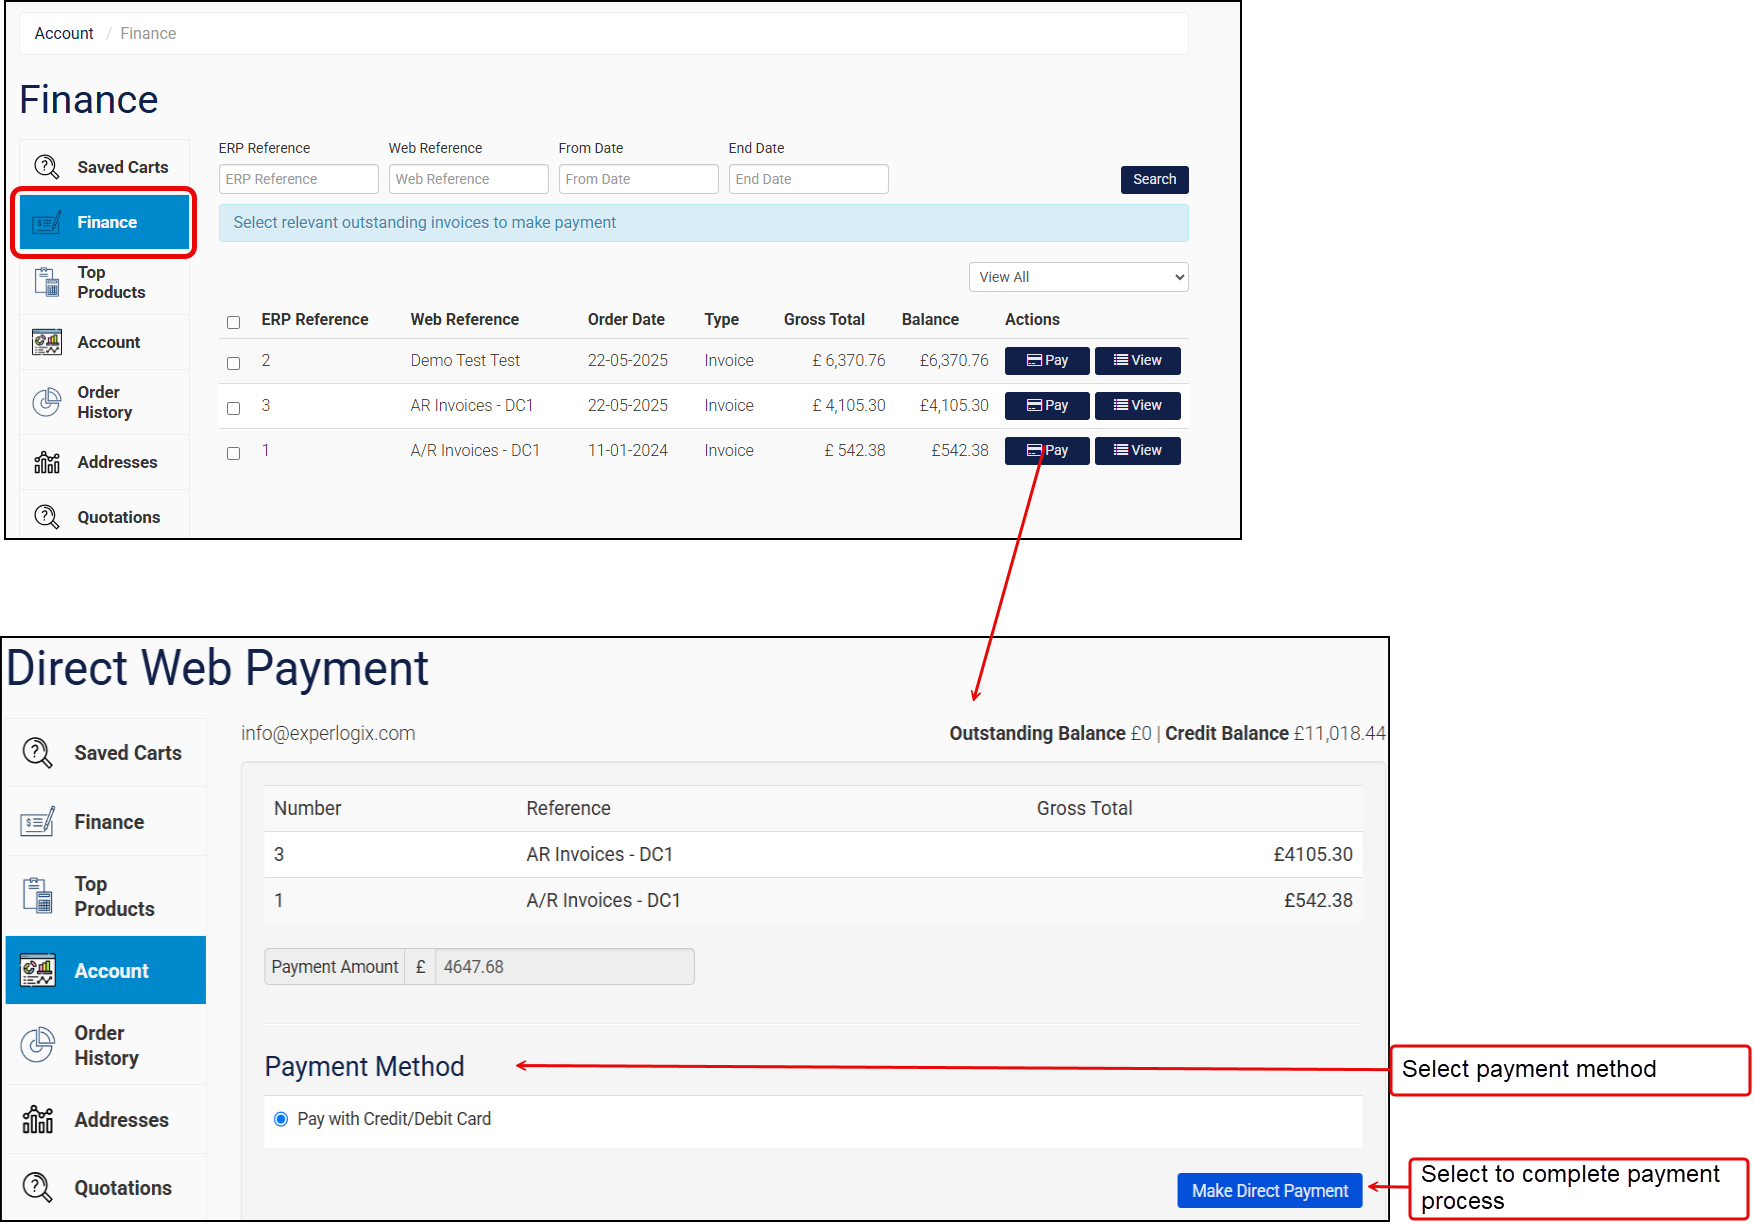
Pay
-
Select Pay to the right of the invoice you wish to pay. This opens the payment screen.
-
Select your payment method, select Make Direct Payment, and follow the payment process.
-
Once a payment has been made for a specific invoice,
-
The Pay button is no longer visible as an option for your customer.
-
Your accounts team receives an email with the amount paid, the web reference, and a payment confirmation reference. This allows your Accounts team to allocate the payment correctly in your ERP.
-
If you use a payment gateway that supports payment on account, the Gateway Reference is returned and displayed on the Payments screen in the Management Interface. See Screen layout: Transactions for more information.
-
The Gateway Reference can be automatically transferred to SAP Business One, enabling your account teams to reconcile payments more easily.
-
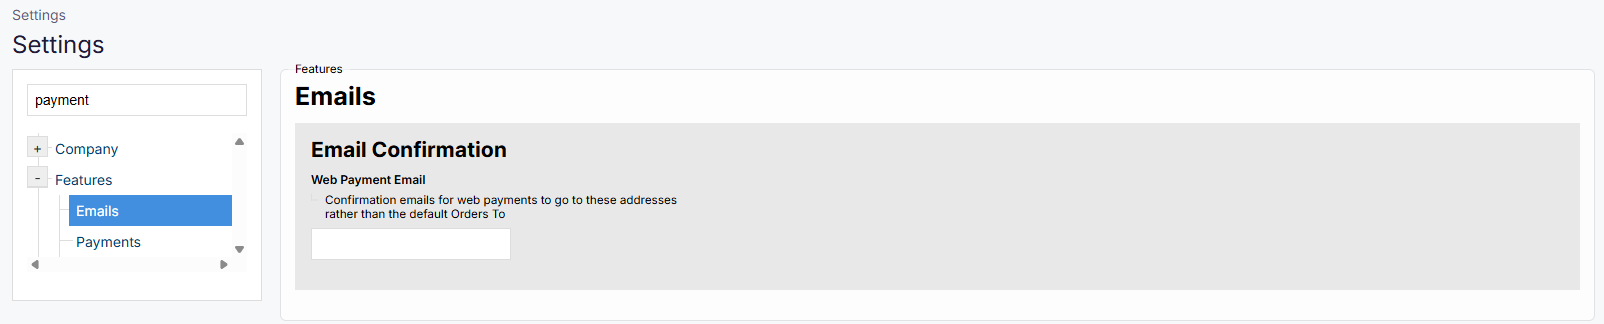
Configure or update the email address for the Accounts Team
-
Open Settings and locate the “Email Confirmation“ setting in Features → Emails.
-
Add or update the email address for the Accounts Team, as shown in the screenshot.
The email is sent to the email address in the Web Payment Email field under Features → Emails in Settings.