Using Page Elements
Purpose and scope
Questions
Page Elements is a HTML-based content tool that can be used to extend the content and style of your WebShop. Page Elements opens up the Digital Commerce platform to content and style updates initialed and managed by you, the Merchant. Now you can add content that is displayed either at the top or bottom of all of your WebShop pages with one HTML snippet. Alternatively, you can modify the existing style for all pages in your WebShop by adding HTML code into the head of each page.
For example, using Page Elements, you can add a link to a promotion to the top or bottom of each page in your WebShop and then track its progress by capturing data on the number of clicks it has generated. Alternatively, you can use Page Elements to override an existing colour or font size for your WebShop easily and quickly.
The purpose of this article is to explain the Page Elements feature.
Key points
Knowledge of coding is required to use this feature. You must understand some basic programming constructs and be comfortable using HTML.
You are responsible for ensuring that the code you have written doesn’t adversely affect your WebShop. We do not provide free support to fix code you have written in the Page Elements editor.
Introducing terms and concepts used in this article
Term | Definition |
|---|---|
Google Analytics 4 | (GA4), captures data from different points on your website and app. The data captured is triggered by events (such as View Product or Checkout) which allows you to understand your customer's experience better and make informed decisions in order to improve business efficiency and sales. |
Hypertext Markup Language | (HTML), the standard markup language for creating Web pages, used to describe the structure of a Web page. |
Uniform resource locator | (URL), the address of a website. |
How it fits together
Page Elements is integrated with Management Interface. It is a HTML-based content tool that allows you extend the content and style of your WebShop. The Page Elements editor uses HTML. HTML is a standard markup language used to describe the structure of a web page. Read this external HTML tutorial for more information about how to use HTML.
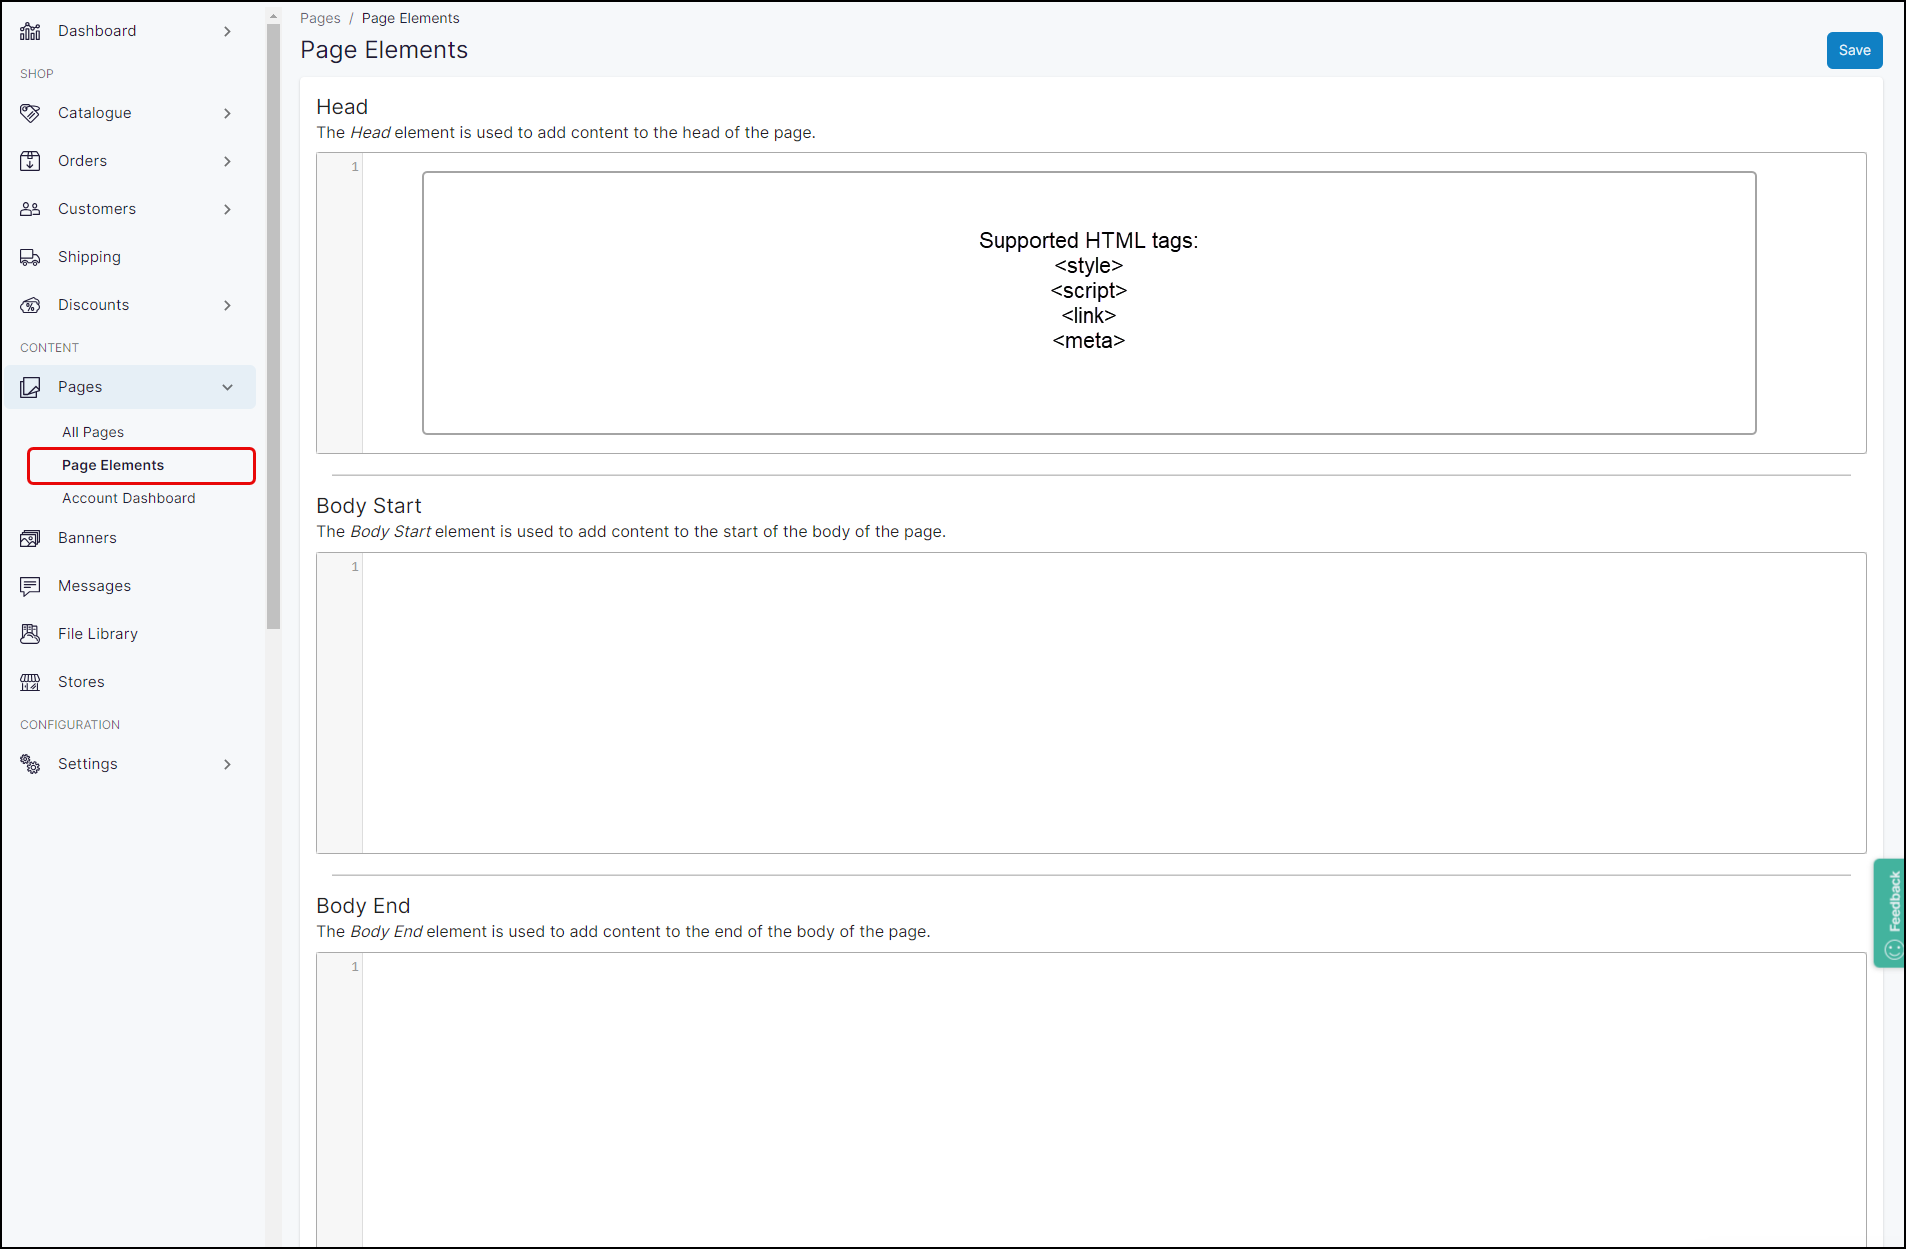
When you open Page Elements, you are presented with an interface that contains three panels, as shown:

Head: gives you access to the <head> section of the HTML of each pages using one of four supported HTML tags - <style>, <script>, <link> and <meta>. You can add scripts and code that extend the functionality of your WebShop. For example, you could use the <script> HTML tag to include a script that contains a Google Analytics tag. This allows you to track data on your eCommerce site.
Body Start: enter HTML to add content to the start of the body of the page. Content is displayed above the top ribbon on each screen in WebShop. For example, you could include a Welcome message or a link to a customer promotion.
Body End: enter HTML to add content to the bottom of the body of the page. Content is displayed below the bottom ribbon on each screen in WebShop. For example, you could include a “Thanks for visiting” message.
Knowledge of HTML is required to use this tool effectively. While you are responsible for ensuring that the code you have written doesn’t adversely affect your WebShop, there is an in-built ‘linting’ or error-checking tool. This tool returns errors if you use an unsupported HTML tag or if your HTML is not syntactically correct.
Remember, that we do not provide free support to fix HTML you have used in Page Elements.
Step by step
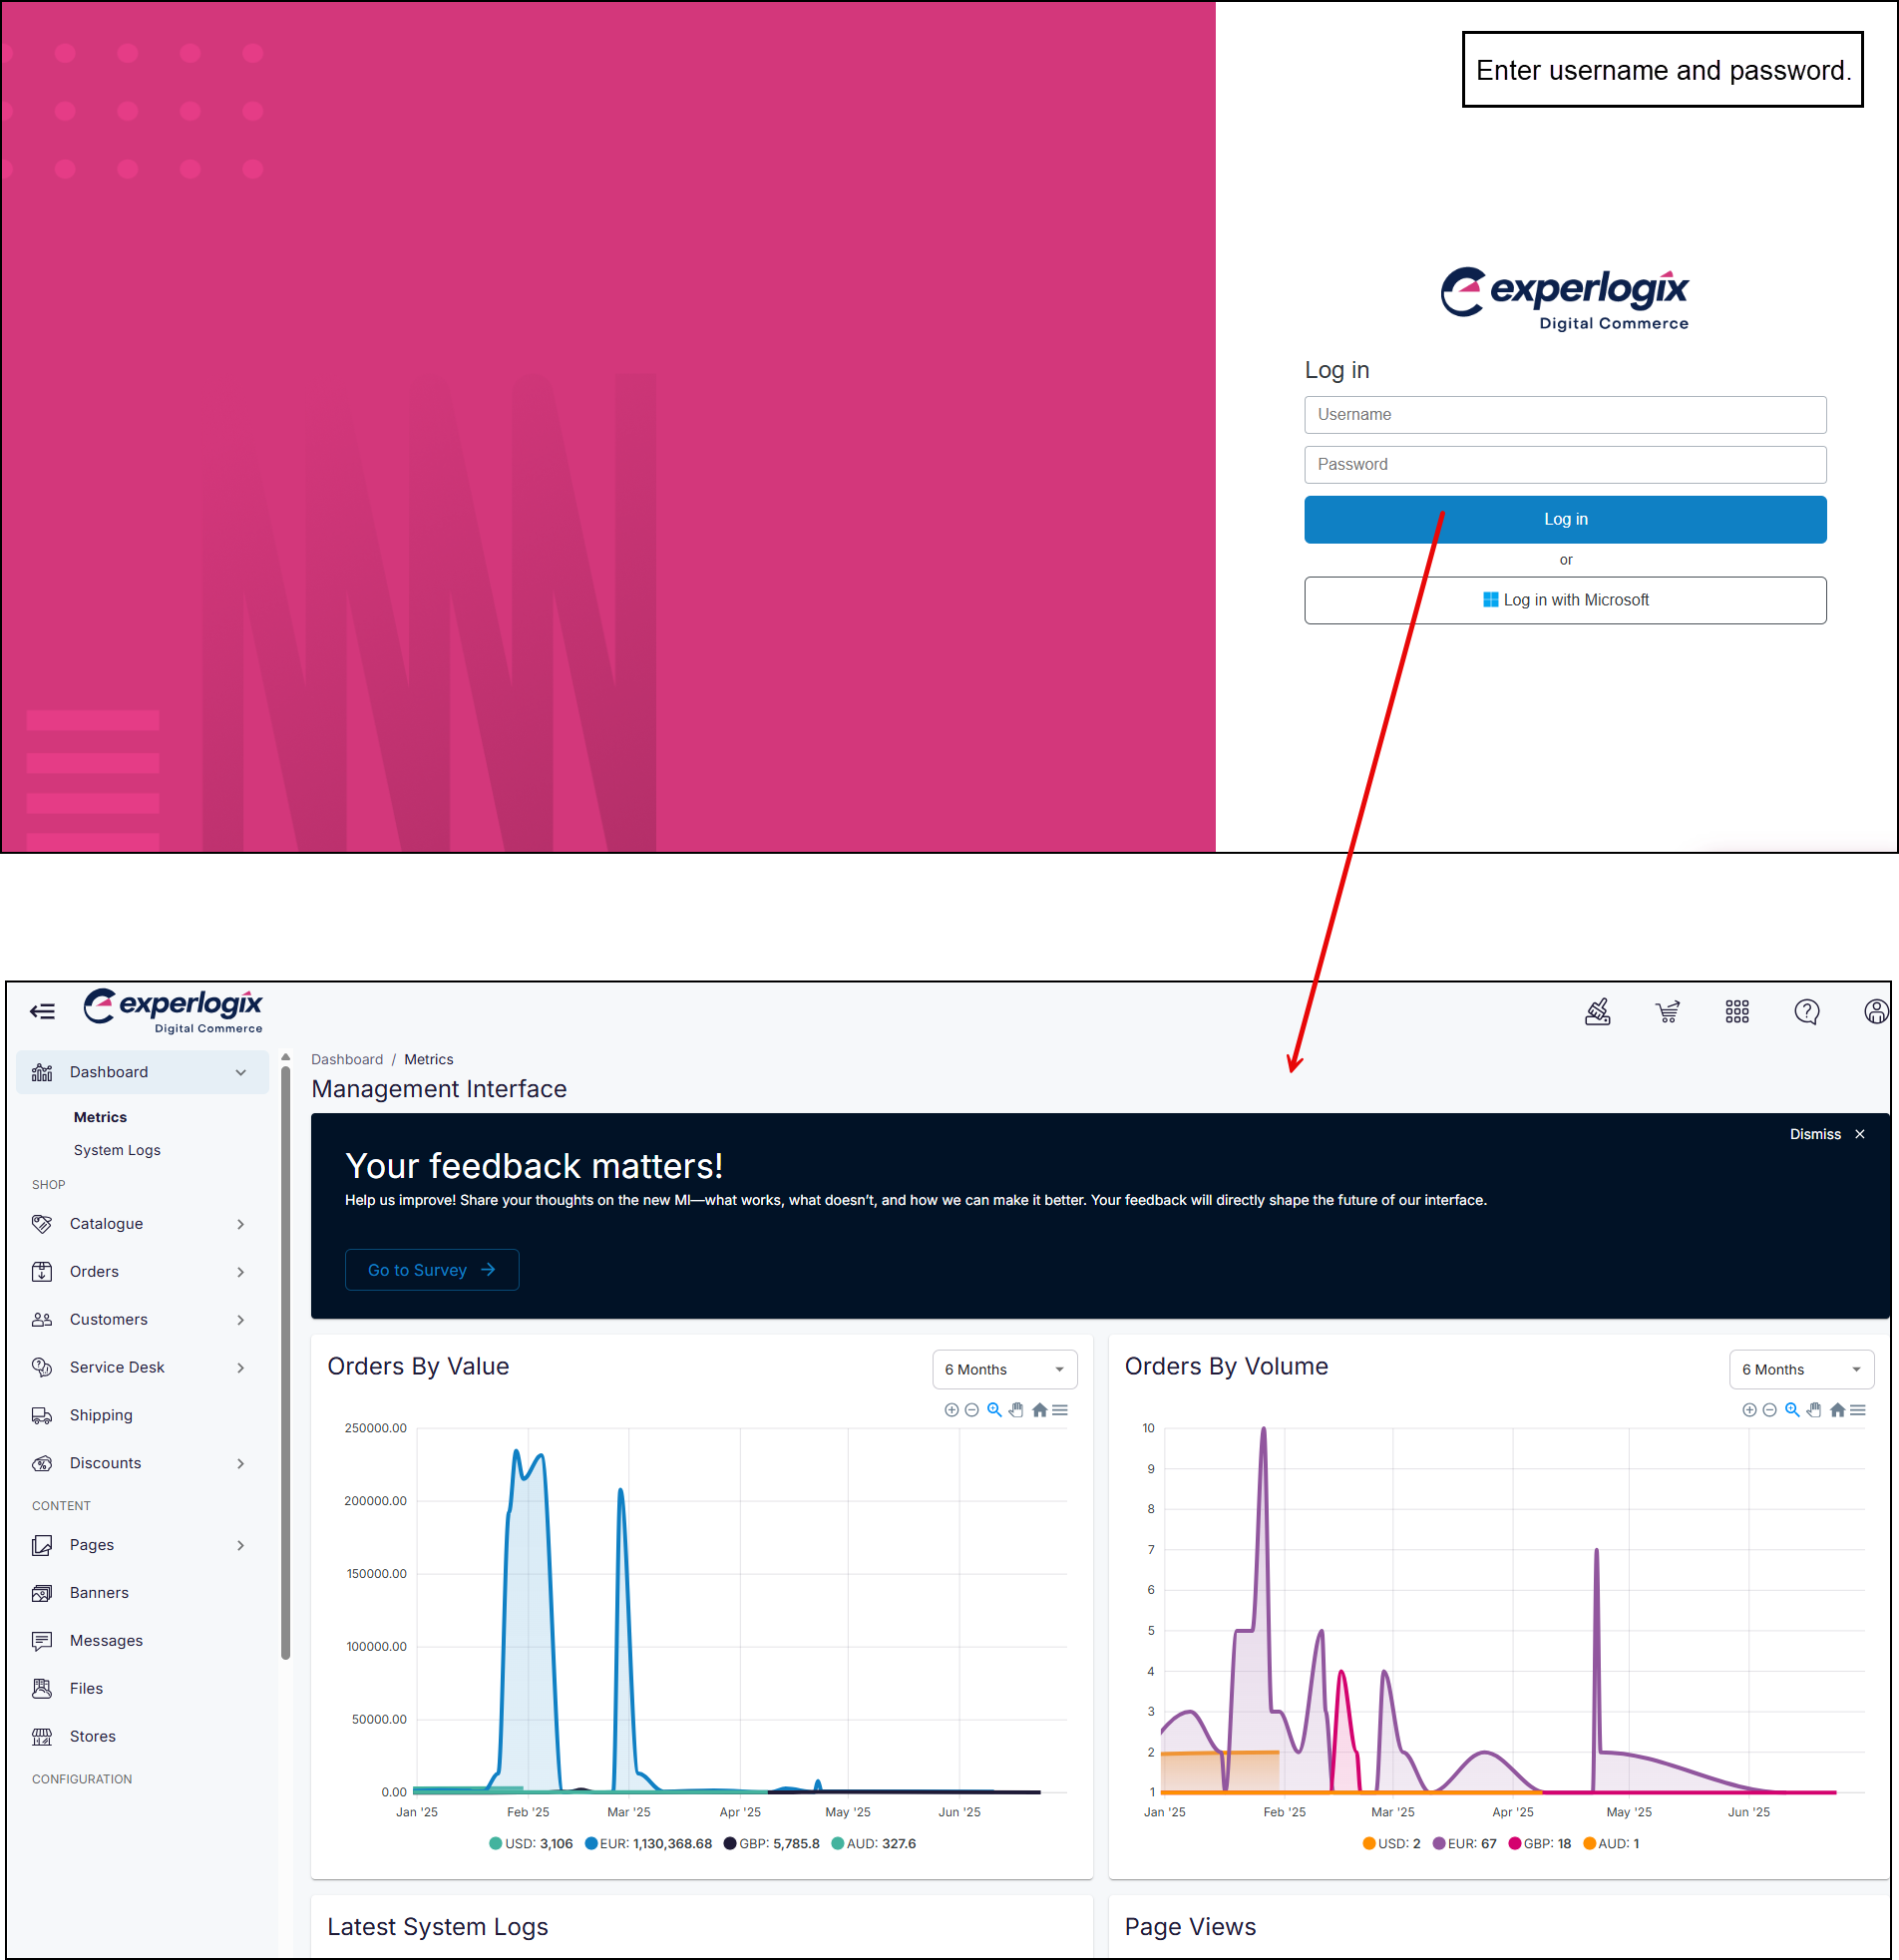
Step 1: Log into Management Interface
Step 2: Open Page Elements editor
Step 3: Add or edit HTML
Use cases
Use case 1: Add a Welcome message to the top of each WebShop page
Use case 2: Track engagement with a promotion link
Related content
References
1 External site: W3 Schools - HTML Tutorial

