Purpose and scope
Do you want to increase your brand’s visibility? Would you like to strengthen your brand? Using a favicon, or browser icon, as the image located to the left of a page’s title in a browser tab can achieve both these aims.
The purpose of this feature guide is to provide a step by step guide on how to add and delete a favicon from WebShop.
Favicons are not changed very frequently; we recommend that you generate a favicon zip file, upload and apply it once.
Introducing terms and concepts used in this article
|
Term |
Definition |
|---|---|
|
Favicon |
(favourite icon), is a small icon consisting of your logo or brand image. Typically, it appears beside a page’s title in a browser tab, but it can also appear in address bars, and in search engine result pages. |
More information
Add a favicon
Add
-
Create your favicon files.
Key points
-
The file that you upload must contain a set of icons of varying sizes and formats. We recommend that you use a free tool, such as Real Favicon Generator, to generate a zip file of your favicon icon files.
-
The file must be stored as a zip folder.
-
We support inclusion of the following three files as part of the zip folder:
-
manifest.json
-
web.manifest
-
browserconfig.xml
-
-
Each file must follow the naming convention described below for each format type.
-
Supported web formats are:
-
Default: 48x48 - named “favicon.ico”
-
16x16 - named “favicon-16x16.png”
-
32x32 - named “favicon-32x32.png"
-
96x96 - named “favicon-96x96.png“
-
-
Supported mobile formats are:
-
192x192 - named “android-icon-192x192.png“
-
512x512 - named “android-icon-512x512.png"
-
60x60 - named “apple-touch-icon.png"
-
-
Supported Microsoft tiles: 150x150 - named “mstile-150x150.png”
-
SVG format is supported, and can be styled and configured within the SVG image itself - named “favicon.svg“
-
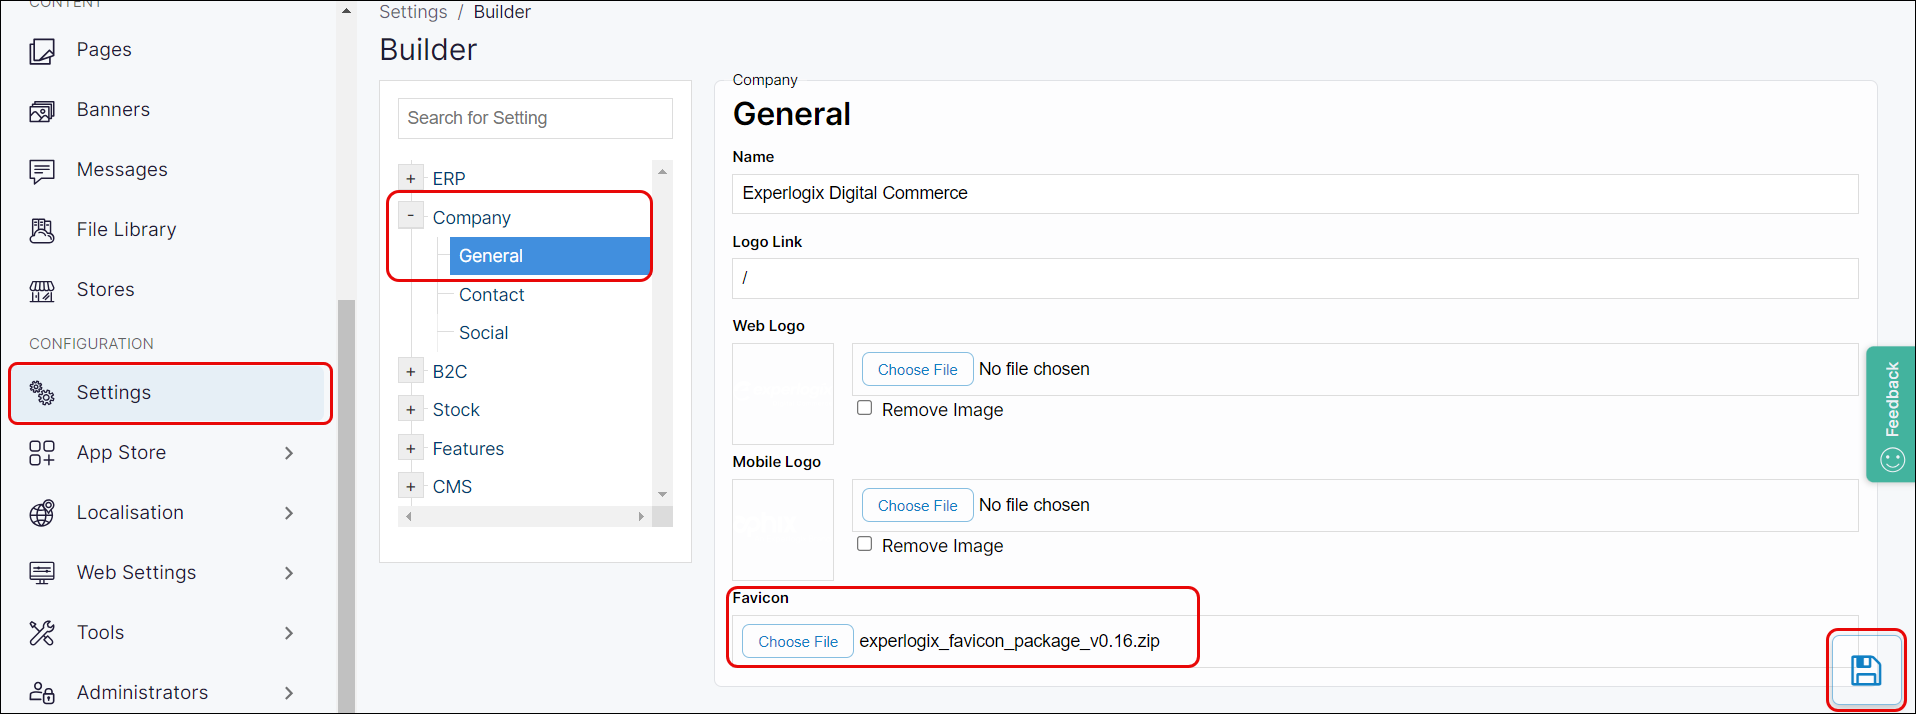
Log into Management Interface.
-
Open Settings → General → Company.
-
Click Choose file under Favicon, locate the zip file and click Open.
-
Click Save. This scans the zip file, creates a favicon folder in your File Library, uploads the file to the newly created folder and applies the favicon to your WebShop.
-
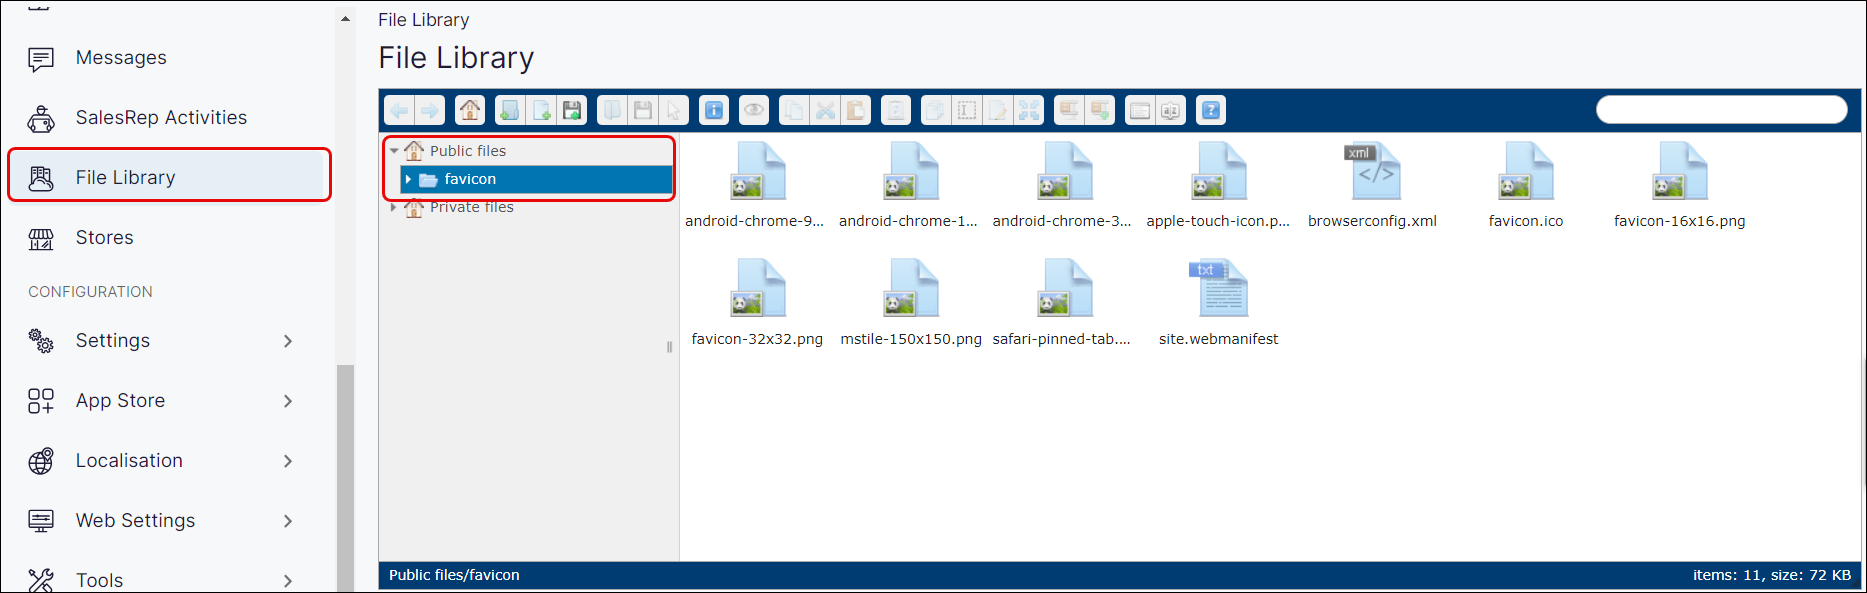
All the files are automatically unzipped and stored in Public Files -> Favicon under File Library.
-
Verify that the favicon has been updated in WebShop.
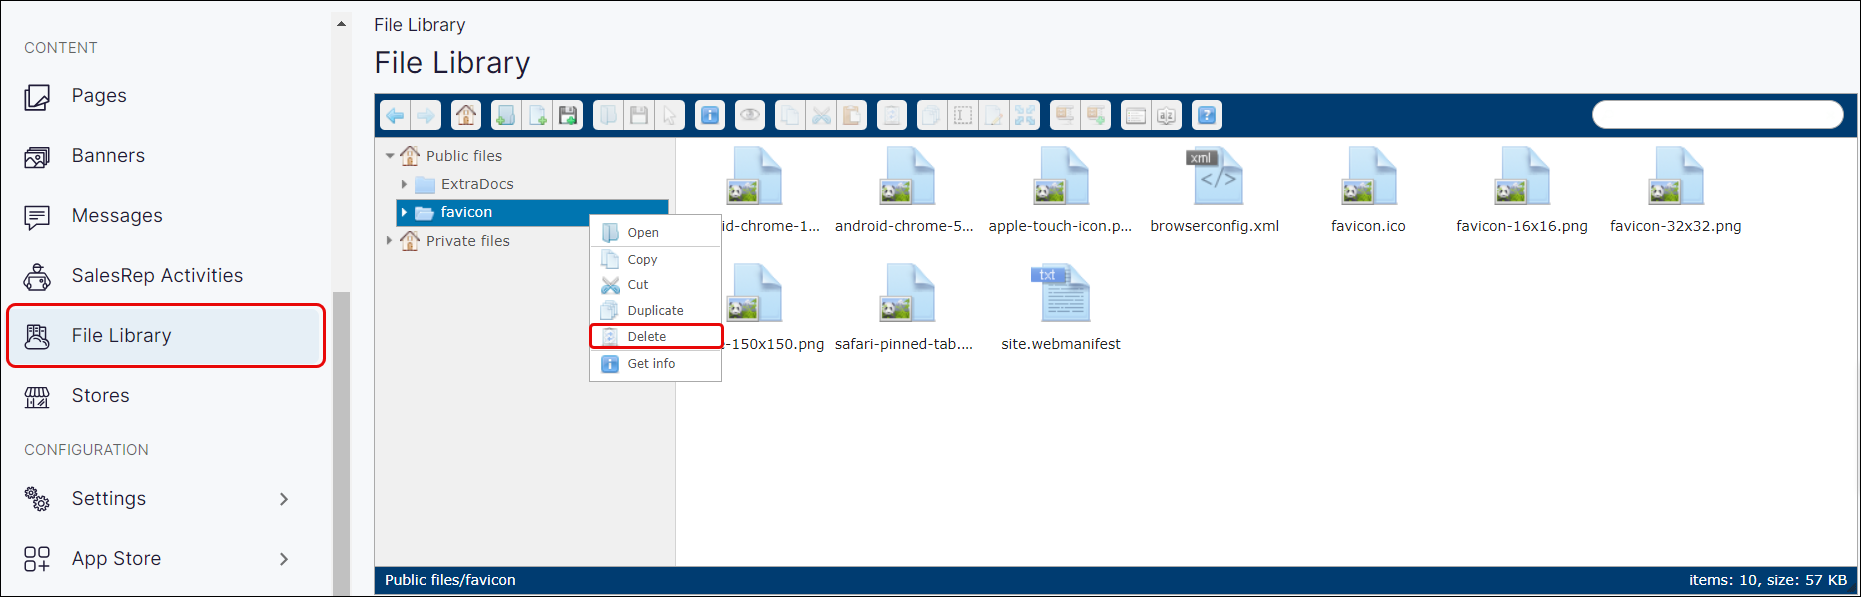
Delete a favicon
Delete
-
Open File Library.
-
Navigate to Public files → favicon.
-
Delete the favicon folder by right-clicking on the folder name and click Delete. This removes the favicon folder and all its contents. The favicon on your WebShop reverts to a browser-specific one.